10 DIY Shoe Storage Ideas
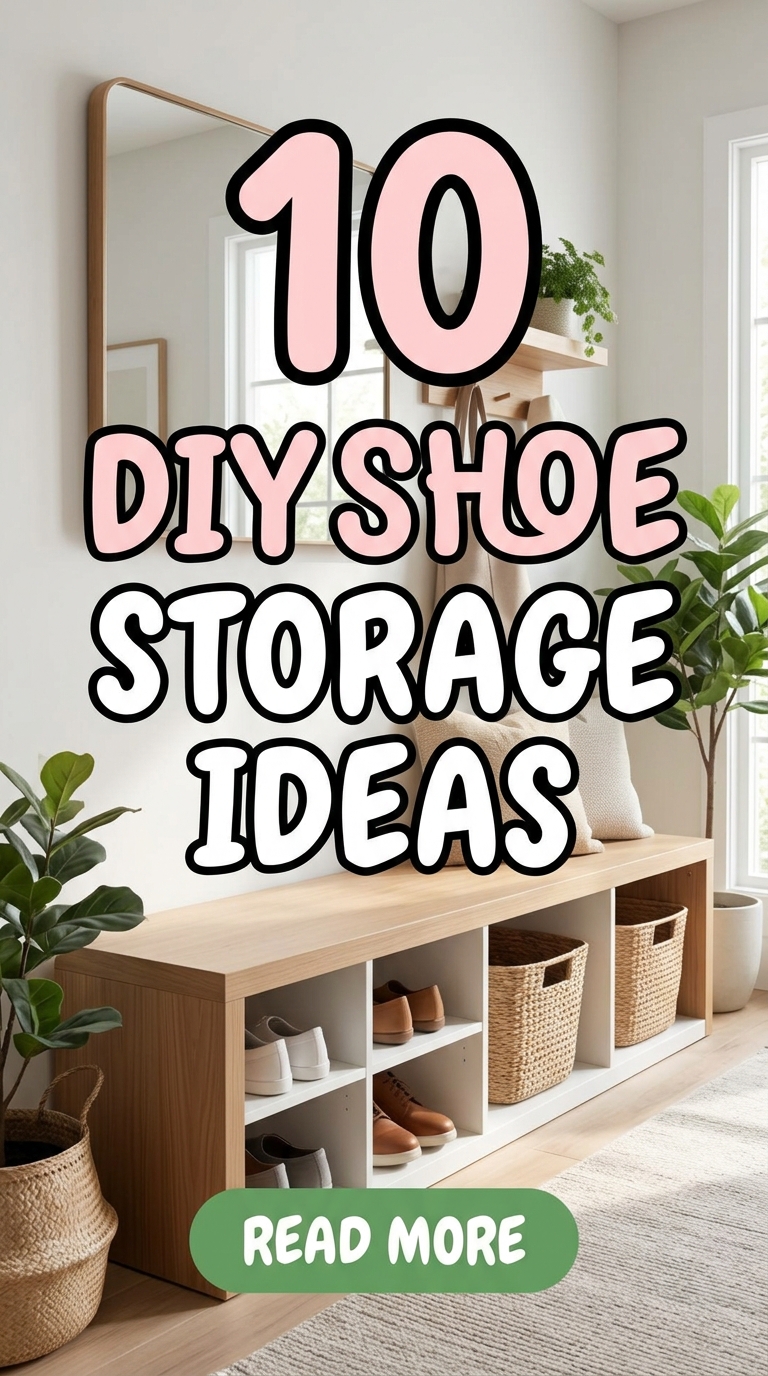
Keeping shoes organized can make a significant difference in the appearance and functionality of any home. Shoes often collect near entryways, closets, bedrooms, or mudrooms, creating unnecessary clutter that reduces available space. DIY shoe storage ideas provide practical solutions that improve organization while adding decorative value to a room. Many projects use simple materials, making them suitable for beginners who want an easy project without specialized woodworking skills. This guide presents ten creative ideas that combine functionality with modern design and aesthetic appeal. Each project explains practical construction methods, planning considerations, and styling suggestions that fit different living spaces. Whether organizing a small apartment, family hallway, or bedroom closet, these Pinterest ideas offer inspiration for creating handmade storage that supports daily routines while maintaining a clean, organized, and attractive home decor environment.
Why DIY Shoe Storage Is Trending
DIY shoe storage continues to grow in popularity because homeowners increasingly value practical organization combined with personalized decoration. Instead of purchasing standard storage units, many people prefer creative ideas that match their available space and interior style. Pinterest inspiration has encouraged minimalist style solutions that use affordable materials while reducing household clutter. These projects are beginner friendly because most require basic measuring, cutting, and assembly techniques rather than advanced construction skills. They also allow flexibility for different shoe collections, from everyday sneakers to seasonal boots. Handmade storage creates opportunities to customize dimensions, colors, and finishes according to individual preferences without relying on expensive furniture. The combination of organization, budget ideas, modern design, and decorative appeal makes DIY shoe storage an accessible project for nearly every household looking to improve functionality.
Materials and Preparation
Successful DIY projects begin with careful planning before construction starts. Measure the available storage location, including width, height, and depth, to ensure the finished organizer fits comfortably without blocking walkways or doors. Common materials include plywood, wooden boards, crates, PVC pipes, baskets, screws, wood glue, nails, sandpaper, paint, and protective finishes. Basic tools often include a measuring tape, pencil, drill, screwdriver, saw, level, and paintbrush. Sketching a simple layout before cutting materials helps reduce mistakes and material waste. Consider the number of shoes that require storage as well as the types of footwear, since boots, sandals, and athletic shoes need different shelf heights. Good planning supports efficient construction and creates an organized result that complements existing home decor while remaining practical for daily use.
Wooden Crate Entryway Organizer
How to Create
Wooden crates provide one of the easiest DIY shoe storage solutions because they already have a stable structure that requires minimal modification. Begin by sanding every surface to remove rough edges before applying paint, stain, or a clear protective finish according to your preferred aesthetic. Position several crates vertically, horizontally, or in alternating patterns to create compartments that accommodate different shoe sizes. Secure stacked crates together with screws for additional stability, especially if the unit will stand in a busy entryway. Add small rubber feet underneath to protect flooring and improve balance. This design works well for family homes because individual compartments naturally separate footwear while maintaining an organized appearance. Decorative baskets can occupy unused spaces for accessories such as umbrellas, gloves, or shoe care supplies, creating a complete organization system that remains practical and visually appealing.

Floating Wall Shoe Shelves
Step-by-Step Guide
Floating shelves transform unused wall space into efficient vertical shoe storage without occupying valuable floor area. Select sturdy wooden boards that comfortably support the weight of multiple pairs of shoes. After measuring the wall, mark evenly spaced shelf positions using a level to maintain straight installation. Attach heavy-duty wall brackets or concealed mounting hardware according to the wall material. Adjust shelf spacing to accommodate different footwear heights, leaving additional room for boots where necessary. Sand and finish each shelf before installation for a polished appearance. The finished arrangement displays shoes neatly while contributing to minimalist style home decor. This storage method also simplifies cleaning beneath the shelves and allows quick access during busy mornings. The open display encourages regular organization because every pair remains visible, reducing misplaced footwear while adding a modern design element to bedrooms, closets, or entryways.

PVC Pipe Shoe Cubes
Setup Method
PVC pipes create compact storage compartments that work particularly well for sneakers, sandals, and children’s shoes. Purchase large-diameter pipes capable of holding individual pairs comfortably, then cut equal lengths using appropriate safety equipment. Smooth each cut edge thoroughly with sandpaper to eliminate rough surfaces before cleaning away dust. Arrange the pipe sections into a honeycomb or grid pattern that maximizes storage capacity while maintaining structural balance. Secure adjoining pieces using strong construction adhesive designed for plastic materials. Once cured, the completed organizer can stand independently or be attached securely to a wall for greater stability. Painting the exterior creates a coordinated appearance that matches surrounding decoration while leaving the interior clean and functional. This creative project combines affordability, efficient organization, and geometric visual interest, making it a popular Pinterest tutorial for compact homes with limited storage space

Bench with Hidden Shoe Storage
How to Make
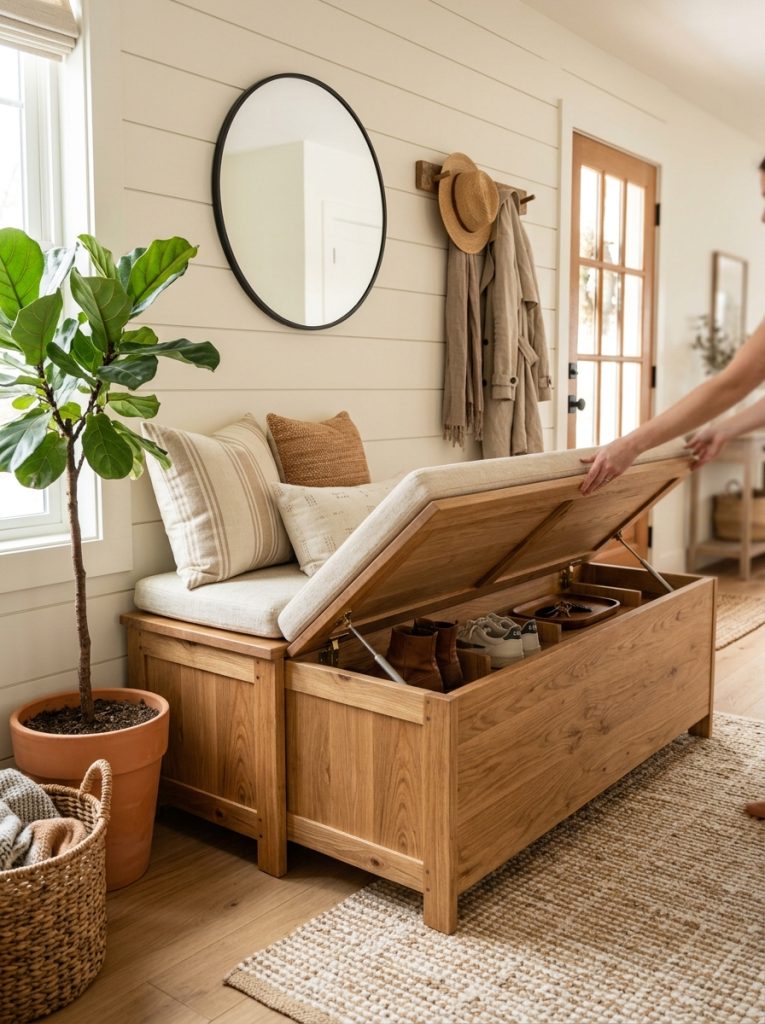
A storage bench combines seating with concealed organization, making it especially useful near entrances where shoes are frequently removed. Construct a simple rectangular frame using sturdy wooden boards and reinforce corners with screws to support daily use. Install interior dividers that create separate storage compartments beneath the seat. Attach the top panel using durable hinges so it opens easily for access while remaining securely closed during normal use. Sand every surface carefully before painting or staining to complement existing furniture. Adding a comfortable cushion transforms the bench into functional seating while maintaining a welcoming atmosphere. This design keeps shoes hidden from view, reducing visible clutter and contributing to a cleaner appearance throughout the entryway. Families benefit from the combination of practical storage, seating convenience, and decorative value within a single handmade furniture piece.
Rolling Shoe Cart
Execution Process
A rolling shoe cart offers flexible organization that can move between closets, laundry rooms, bedrooms, or entryways as needed. Build a compact shelving frame using plywood or solid wood with evenly spaced horizontal shelves sized according to your shoe collection. Reinforce joints securely because movement places additional stress on the structure over time. Attach lockable caster wheels underneath the base to ensure smooth movement while preventing unwanted rolling when stationary. Paint or seal the finished cart for durability and easy cleaning. Organize footwear according to frequency of use, placing everyday shoes on upper shelves for convenient access while storing seasonal pairs below. This project maximizes mobility without sacrificing storage capacity and works particularly well in homes where space serves multiple purposes. The organized structure simplifies cleaning because the entire unit can move effortlessly whenever floor maintenance is required.

Ladder Style Shoe Rack
How to Create
A leaning ladder rack introduces vertical storage with decorative appeal suitable for bedrooms, dressing areas, or modern entryways. Construct two long side rails connected by evenly spaced wooden rungs using screws and wood glue for strength. Position additional narrow shelves across selected rungs to increase storage flexibility while preserving the ladder appearance. Sand and finish all components before final assembly to achieve a smooth surface. Lean the completed rack securely against a wall at an appropriate angle that provides stability while maintaining easy access to stored shoes. Place lighter footwear on upper levels and heavier shoes toward the bottom to improve balance. This project combines organization with stylish presentation, allowing shoes to become part of the room’s decoration instead of hidden clutter. The open structure also promotes airflow, helping footwear remain fresh between uses.

Stackable Wooden Shoe Boxes
Step-by-Step Guide
Stackable wooden boxes provide modular organization that adapts as shoe collections grow. Build multiple identical boxes using plywood panels cut to consistent dimensions. Assemble each unit carefully with screws and wood glue, ensuring square corners for stable stacking. Sand every surface before applying paint, stain, or clear finish according to the desired home decor style. Drill small ventilation holes along the sides if enclosed storage is preferred. Once completed, arrange the boxes vertically or horizontally depending on available space and storage requirements. Secure stacked units together using brackets if constructing taller arrangements. Labels or decorative nameplates simplify organization by identifying different categories such as sports shoes, formal footwear, or seasonal items. This beginner friendly project offers flexibility because individual modules can be rearranged, expanded, or relocated without rebuilding the entire storage system.

Under-Bed Sliding Shoe Storage
How to Make
The area beneath a bed often provides valuable unused storage that can accommodate numerous pairs of shoes without occupying additional living space. Construct a shallow wooden tray with reinforced corners sized precisely to fit beneath the bed frame while allowing smooth movement. Attach durable caster wheels or furniture sliders underneath the base for effortless access. Divide the interior into compartments using thin wooden separators that keep pairs organized during movement. Finish the tray with paint or protective coating to improve durability and simplify cleaning. Add a simple handle at the front edge for convenient pulling. Organizing footwear by season or frequency of use helps maximize efficiency while reducing closet congestion. This hidden storage solution supports minimalist style interiors because shoes remain completely out of sight while remaining easily accessible whenever needed.

Rustic Pallet Shoe Rack
Setup Method
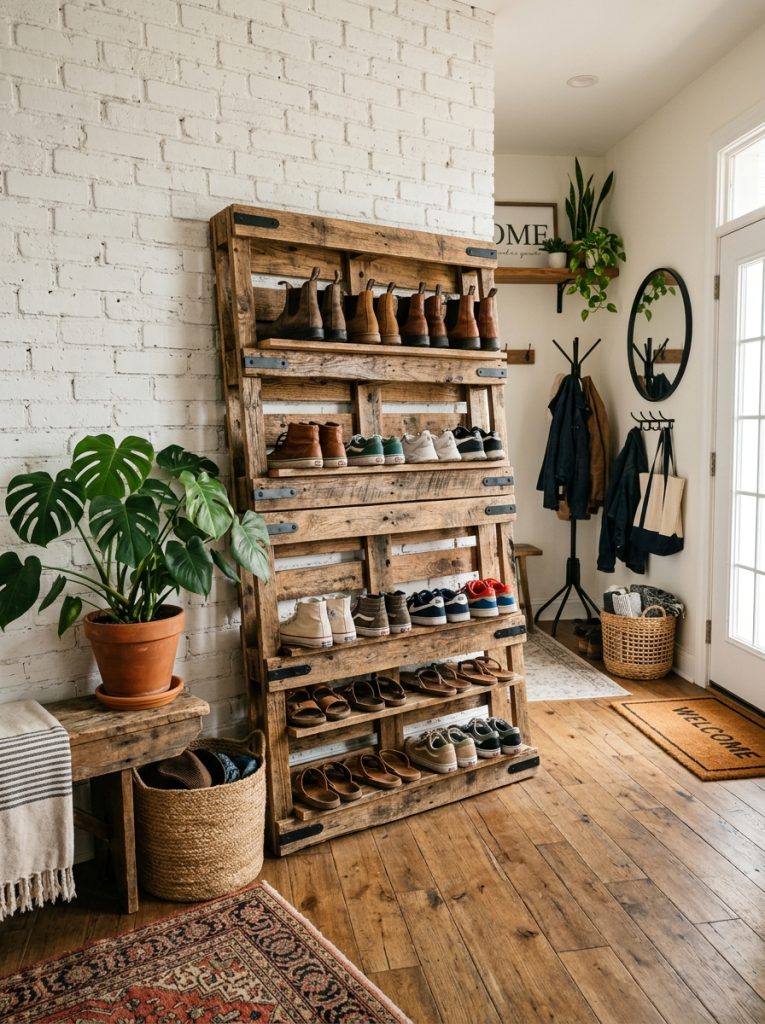
Reclaimed wooden pallets provide an environmentally conscious material for building attractive shoe storage with rustic character. Begin by selecting clean pallets in good structural condition before carefully removing damaged boards or protruding nails. Sand every surface thoroughly to create a smooth finish while preserving the natural wood texture. Depending on the available space, position the pallet vertically against a wall or modify it by adding extra shelves between existing slats. Secure the finished rack firmly to prevent movement during everyday use. Applying a protective finish helps preserve the wood while maintaining its distinctive appearance. Shoes slide naturally between pallet openings, creating an organized display that complements farmhouse, industrial, or rustic home decor themes. This creative project demonstrates how recycled materials can become functional furniture while supporting sustainable household organization.
Decorative Basket Shoe Station
How to Create
Decorative baskets offer a simple handmade storage solution that combines organization with visual warmth. Select baskets large enough to hold multiple pairs while fitting comfortably beneath benches, console tables, or open shelving units. Arrange baskets according to household needs, assigning individual containers for adults, children, guests, or seasonal footwear. Small labels attached to each basket simplify daily organization and encourage consistent use by every family member. Position a washable floor mat beneath the storage area to collect dirt and moisture before shoes enter the baskets. Coordinating basket colors and textures with surrounding decoration creates a cohesive appearance without requiring complicated construction. This easy project works especially well for renters because it requires no permanent installation while remaining flexible enough to move whenever room layouts change. The result is a neat, accessible, and attractive storage station.

Common Beginner Mistakes and How to Avoid Them
Many DIY shoe storage projects encounter problems because planning receives insufficient attention before construction begins. One common mistake involves inaccurate measurements that produce shelves too narrow or too short for intended footwear. Measuring both available space and shoe dimensions prevents this issue. Another frequent error is selecting weak materials that cannot safely support repeated daily use. Reinforcing joints with screws and quality wood glue increases durability significantly. Skipping sanding may leave rough surfaces that damage shoes or create safety hazards during handling. Poor organization planning also reduces effectiveness because different footwear types require varying storage heights. Finally, overlooking wall anchors or stabilization methods can create unsafe storage units, particularly for taller structures. Careful preparation, accurate planning, and steady construction practices help beginners complete projects successfully while achieving reliable long-term organization.
Practical Tips for Better Results
Careful attention to finishing details greatly improves both appearance and durability. Sand all wooden surfaces thoroughly before applying paint or protective coatings to achieve a smooth professional finish. Use moisture-resistant finishes if the storage will remain near entrances exposed to wet footwear. Leave enough space between shelves for comfortable access instead of maximizing capacity excessively. Organize shoes according to daily use, placing frequently worn pairs at convenient heights while storing occasional footwear higher or lower. Maintain consistent spacing throughout the organizer to create visual balance and improve usability. Cleaning the storage regularly prevents dirt accumulation and preserves attractive presentation. Adding simple labels, trays, or removable liners also supports long-term organization by simplifying maintenance. These practical adjustments transform basic DIY projects into efficient storage solutions suitable for everyday household routines.
Styling, Presentation, and Organization Ideas
Well-organized shoe storage contributes to the overall appearance of a room rather than serving only a practical function. Coordinate finishes with nearby furniture to create visual consistency throughout the space. Neutral colors complement minimalist style interiors, while natural wood finishes introduce warmth into contemporary home decor. Decorative storage baskets, indoor plants, framed artwork, or small mirrors positioned nearby can transform an ordinary storage area into an inviting entryway feature. Group similar footwear together according to style, season, or family member to simplify everyday routines. Maintain uncluttered surfaces by limiting decorative accessories to a few carefully selected items that complement rather than overwhelm the storage system. Balanced organization supports both efficiency and aesthetic presentation, creating an attractive environment that reflects thoughtful planning.
Budget and Time Planning
Successful DIY projects benefit from realistic budgeting and organized scheduling before materials are purchased. Prepare a complete list of required supplies and compare measurements carefully to reduce unnecessary waste. Many projects can incorporate reclaimed wood, leftover paint, or recycled containers, helping reduce overall costs while supporting sustainable practices. Simpler storage ideas such as basket stations or crate organizers may be completed within a few hours, whereas furniture-style projects often require a full weekend to allow proper assembly, drying, and finishing. Divide construction into manageable stages including measuring, cutting, assembly, sanding, finishing, and installation. Working systematically improves accuracy while reducing fatigue that may contribute to mistakes. Good planning creates an enjoyable creative project that remains affordable without compromising quality or durability.
Creative Expansion and Advanced Inspiration
After mastering basic DIY shoe storage, additional features can further improve organization and functionality. Incorporate adjustable shelving to accommodate changing footwear collections over time. Combine shoe storage with coat hooks, seating, or accessory compartments to create complete entryway organization stations. Install soft lighting beneath shelves for improved visibility in darker closets. Decorative trim, contrasting paint colors, or patterned liners add personalized character while maintaining practical use. Hidden compartments may store shoe care supplies, umbrellas, or seasonal accessories without increasing visible clutter. Modular designs allow future expansion as household needs change. These advanced ideas build upon beginner friendly techniques while encouraging continued creativity and improved space management. The result is a handmade storage solution that evolves with the home while maintaining efficient organization and attractive modern design.





Post Comment