10 Kitchen Counter Decor Ideas
Decorating kitchen countertops effectively requires balancing daily culinary utility with intentional aesthetic choices to build a welcoming atmosphere. Kitchen counter space serves as a central hub for food preparation, daily coffee routines, and household activity. Readers will explore ten actionable design strategies, step by step instructions, and organizational techniques to elevate their cooking environment without sacrificing functional work surfaces. Integrating structured trays, natural textures, elevated risers, and cohesive storage containers transforms cluttered counters into organized visual highlights. This comprehensive tutorial covers fundamental planning steps, required materials, and practical styling methods tailored to kitchens of any size or architectural layout. By implementing strategic placement and durable handmade accents, homeowners can establish an elegant, beginner friendly setup that brings daily order and timeless beauty to the heart of the home.
Why This Idea Is Trending or Useful
Kitchen counter styling remains among the top trending ideas across popular design platforms because it directly impacts household efficiency and visual order. Modern interior design emphasizes functional beauty, prioritizing clean counter space alongside curated decorative elements. The practical value of styled kitchen counters lies in consolidating daily essentials, such as utensils, oils, and spices, into accessible, beautifully structured zones. From a DIY perspective, updating countertop decor offers an easy project with an immediate visual return that does not require expensive structural renovations. Beginners can easily achieve a balanced minimalist style by arranging simple cutting boards, ceramic crocks, and fresh greenery using basic layout principles. This creative project adapts effortlessly to seasonal updates while offering versatile storage solutions that maintain long-term kitchen organization across contemporary, traditional, or rustic spaces.
Materials and Preparation
Thorough preparation and intentional material selection are essential steps before styling your kitchen countertops for long-lasting appeal. Primary decorative materials include wooden cutting boards, marble risers, ceramic storage jars, woven trays, glass dispensers, and potted indoor plants. Necessary cleaning and preparation tools include a measuring tape, gentle surface cleaner, microfiber cloths, wood conditioning oil, and small felt furniture pads. Begin by completely clearing all items off the countertop surfaces to perform a deep cleaning and assess available workspace accurately. Measure counter depth and identify high-traffic prep areas near the sink, stove, and refrigerator to keep vital prep space open. Evaluate natural lighting patterns throughout the room to determine appropriate placements for live plants or delicate decor items. Planning considerations must prioritize food safety and heat resistance by placing flammable wooden accents safely away from direct stovetop heat sources.
Layered Wooden Board Backsplash Display
Step-by-Step Guide
Positioning a collection of solid wood cutting boards against the kitchen backsplash creates a rich, warm backdrop that hides outlet covers while adding functional texture. Select three wooden boards in varying shapes, such as a large rectangular paddle board, a medium round board, and a tall arched board. Clean and condition each board thoroughly using food-safe mineral oil to enhance the natural grain before setting up the arrangement. Stand the largest board vertically against the tile backsplash behind your primary prep zone, securing its base with small non-slip rubber pads. Layer the medium board slightly overlapping the front of the base board at a subtle diagonal angle to introduce structural depth. Place the smallest decorative board in front, anchoring the layered group with a small potted herb or a ceramic jar filled with wooden spoons. This beginner friendly arrangement provides instant aesthetic warmth while keeping everyday chopping surfaces within arm’s reach during meal preparation.

Elevated Marble Riser Oil and Spice Station
Execution Process
Utilizing a raised marble pedestal near the stovetop keeps liquid condiments and cooking spices organized while protecting quartz or granite counters from oil drips. Choose a rectangular or round marble slab equipped with low metal or wooden feet to elevate cooking ingredients above the main surface. Position the riser along the back counter edge immediately adjacent to your cooking range, maintaining safe clearance from open flames or hot burner elements. Place clear glass pump bottles containing olive oil, vegetable oil, and vinegar directly on top of the marble slab to streamline daily cooking. Add matching small glass jars filled with sea salt, cracked black pepper, and frequently used dry spices alongside the oil dispensers. Complete the station by adding a small ceramic spoon rest in the front corner to keep cooking utensils off the countertop, creating a clean, functional culinary zone that simplifies cooking workflows.

Woven Basket Appliance Tray Consolidation
Setup Method
Gathering small countertop appliances and morning beverage tools into a shallow woven tray reduces visual clutter and defines a clear functional zone. Measure the footprint of your electric kettle, coffee maker, or toaster to select a wide, shallow seagrass or rattan basket that fits the items comfortably. Line the base of the woven basket with a soft fabric liner or clear protective mat to catch stray liquid drips and crumb particles. Place the basket in an underutilized counter corner, routing electrical power cords neatly behind the tray perimeter toward nearby wall outlets. Arrange a ceramic sugar bowl, small creamer pitcher, and a jar of coffee beans inside the tray space alongside the brewing equipment. This practical grouping transforms scattered kitchen tools into an organized coffee corner, establishing a clear visual boundary that keeps adjacent counter areas open and easy to wipe clean.
Vertical Tiered Stand Fresh Produce Center
How to Create
Incorporating a multi-tiered metal or wooden display stand maximizes vertical storage space while keeping fresh fruit and vegetables accessible for daily snacking. Select a two-tier or three-tier round stand crafted from black powder-coated iron or natural acacia wood, verifying structural balance on a flat surface. Position the stand on a open counter section away from direct heat sources and harsh sunlight to preserve fruit freshness longer. Arrange heavier produce like apples, oranges, and lemons across the larger bottom tier to establish a stable structural center of gravity. Place smaller items like limes, garlic bulbs, or avocados on the upper tiers, grouping items by color to create a visually appealing display. This space-saving tutorial method frees up valuable flat counter space while introducing vibrant natural colors into your kitchen decor through seasonal produce arrangements.
Ceramic Crock Utensil Cluster
Step-by-Step Guide
Grouping frequently used kitchen tools inside a heavy ceramic crock near the stove consolidates utensils while introducing artisanal texture to the cooking area. Choose a wide-mouthed earthenware or stoneware crock finished in a neutral glaze, such as matte white, soft taupe, or warm cream. Thoroughly wash and dry all wooden spoons, stainless steel turners, silicone spatulas, and metal tongs before organizing them into the crock. Place the longest utensils near the back of the vessel, arranging shorter items in the front to ensure equal visibility and easy access during active cooking. Set the filled ceramic crock on the counter surface immediately beside the stove, pairing it with a small wooden salt cellar or a tiny glass vase containing fresh rosemary sprigs. This classic storage approach prevents cluttered drawers, keeps essential tools at hand, and provides a timeless decorative accent that complements both modern and traditional kitchen styles.

Glass Jar Pantry Staple Display
Setup Method
Displaying dry cooking ingredients inside uniform glass storage jars creates a clean, minimalist style arrangement that offers both utility and visual interest. Select three to four airtight glass canisters featuring natural bamboo or acacia wood lids in graduated sizes to establish balanced height variation. Wash and dry the glass jars thoroughly before filling them with colorful dry staples like rolled oats, white rice, dried pasta, or unpopped popcorn kernels. Affix minimalist, waterproof labels to the front face of each jar at a consistent height to maintain a neat visual order across the display. Arrange the filled canisters in a neat row or clustered group along an open counter wall, placing the tallest jar in the rear corner. This practical organization method allows you to monitor pantry ingredient levels effortlessly while adding organic colors and repetitive structural shapes to your countertop layout.

Repurposed Vintage Architectural Pedestal
Execution Process
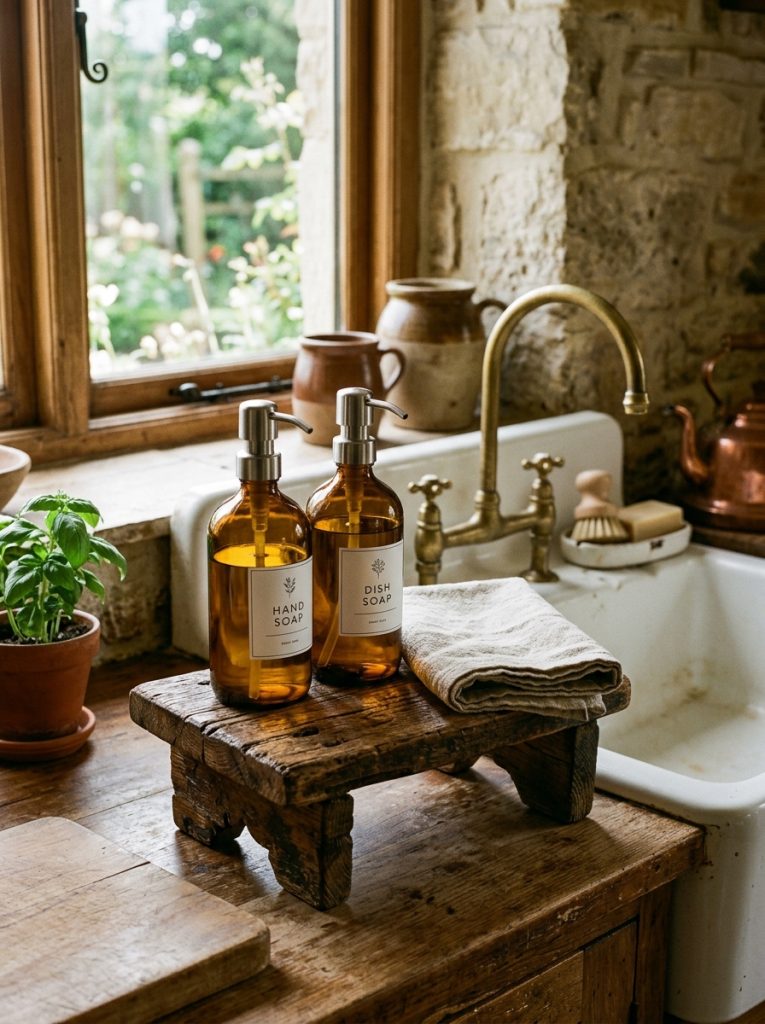
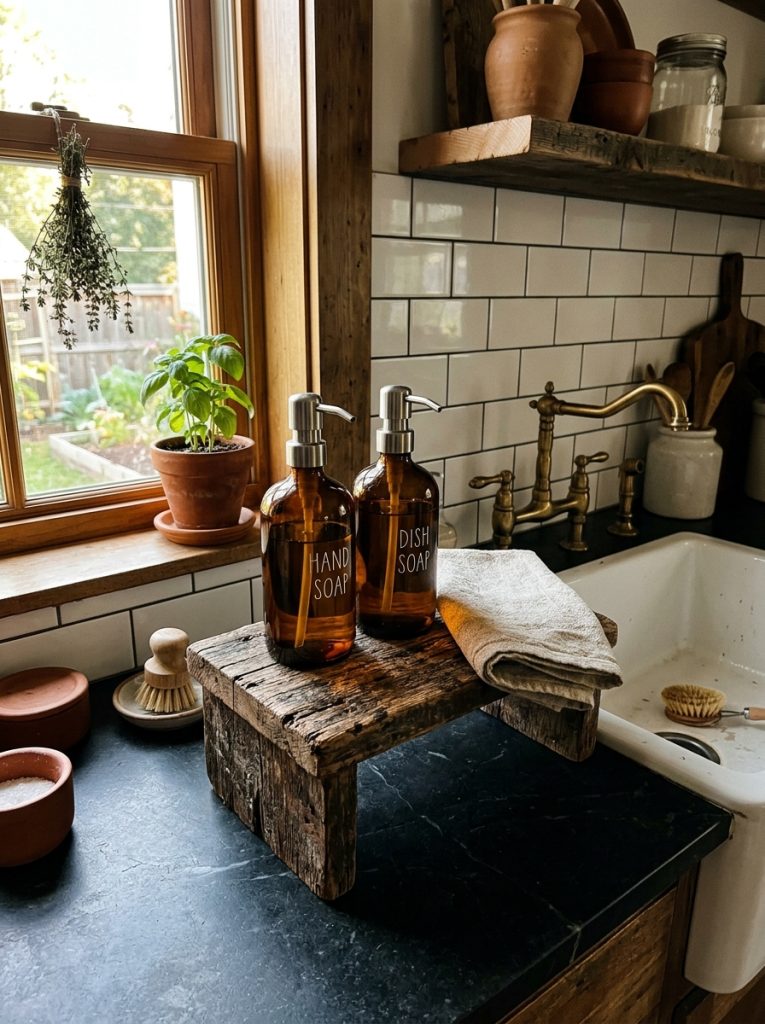
Repurposing a vintage wooden riser or antique pedestal brings unique historical character and tactile contrast to smooth, modern countertop surfaces. Source a small reclaimed wood riser or distressed wooden block featuring original grain markings and a sealed, food-safe antique finish. Set the wooden pedestal in a central counter location, such as adjacent to the main kitchen sink or along an island end section. Place a clear glass soap dispenser and a ceramic bottle of hand lotion on top of the elevated wooden platform to protect counter surfaces from soapy residue. Add a small glass jar containing a natural sea sponge or a rolled linen hand towel beside the soap bottles to complete the utility station. This rustic design strategy elevates everyday sink accessories off the flat counter deck, preventing water accumulation while introducing a rich handmade aesthetic into modern kitchens.

Fresh Botanical Glass Vase Arrangement
How to Create
Displaying fresh botanical cuttings or leafy branches inside a tall glass vase introduces natural movement, height, and vibrant color to kitchen counter corners. Select a heavy-based clear glass jar or ceramic urn that provides sufficient weight to support tall botanical stems without tipping over. Fill the vessel halfway with fresh, cool water, adding a few drops of liquid flower food to extend the lifespan of live plant cuttings. Cut leafy stems like eucalyptus, olive branches, or monstera leaves at a sharp diagonal angle, removing lower foliage that falls below the waterline. Position the filled vase in an open counter corner or along the center of a kitchen island where it will not obstruct sightlines or overhead cabinet doors. Swap out water every three days to maintain clarity, keeping the arrangement looking crisp, vibrant, and welcoming as a natural home decor centerpiece.

Integrated Cookbook Stand Culinary Zone
Step-by-Step Guide
Setting up a dedicated cookbook stand creates a practical reading station for recipes while converting beautiful food photography into active wall art. Choose a sturdy wooden or iron cookbook holder equipped with a weighted front ledge or clear acrylic shield to hold book pages open securely. Position the stand on a dry counter section away from the main sink splatter zone, angling the surface slightly toward your main prep area. Place a favorite hardcover cookbook onto the stand, opening it to a colorful recipe page featuring vibrant food imagery or classic culinary illustrations. Pair the cookbook display with a small ceramic jar holding tasting spoons and a tiny timer to build a complete recipe prep corner. This creative project adds functional convenience during meal preparation while transforming everyday cookbooks into an engaging, dynamic decor element that changes whenever you flip the page.

Under-Cabinet Task Lighting Accent
Setup Method
Installing warm LED strip lights beneath upper cabinets illuminates countertop decor arrangements clearly while providing valuable task lighting for evening meal prep. Select self-adhesive LED light strips or slim puck lights featuring adjustable brightness settings and a warm color temperature between 2700K and 3000K. Clean the underside of your upper cabinets with rubbing alcohol to remove grease films, ensuring optimal adhesive mounting performance across the surface. Attach the light strips along the front interior edge of the cabinet bottoms, directing the illumination downward toward the backsplash and counter deck. Route power wires neatly along cabinet corners using small adhesive cord clips, connecting the system to a nearby outlet or smart plug adapter. Switch on the under-cabinet lighting during evening hours to highlight textured cutting boards, ceramic crocks, and marble risers, creating a soft, warm ambiance across your styled countertops.

Common Beginner Mistakes and How to Avoid Them
A frequent mistake when styling kitchen countertops is overcrowding surfaces with too many decorative objects, which severely restricts functional prep space. Avoid placing decorative items directly in central work zones; instead, restrict decor arrangements to corners, edges, and areas beneath upper cabinets. Another common error is mixing too many competing textures, bright colors, or disjointed themes that create visual confusion across the room. Maintain cohesive design by selecting a primary material tone, such as light wood or black metal, and repeating it across all counter accents. Additionally, using porous materials like unsealed wood or raw stone directly beneath oil bottles leads to stubborn grease stains that damage surfaces over time. Protect porous decorative items by applying food-safe sealants, using non-porous risers for liquid containers, and placing protective felt pads underneath all heavy objects to prevent counter scratches.
Practical Tips for Better Results
Achieving professional styling results relies on balancing item heights, utilizing tray boundaries, and keeping functional zones clear for daily cooking tasks. Incorporate the design rule of threes by grouping items in odd numbers, such as pairing a tall vase, medium board, and small candle together. Vary object heights within a single cluster using marble risers or wooden blocks to create visual depth and structural interest across the counter space. Always maintain a clear, unobstructed work triangle between the sink, refrigerator, and stovetop so meal preparation remains smooth and efficient. Group small, related accessories inside shallow trays or on pedestals to keep individual items contained, making it easy to lift and move whole arrangements during routine counter cleaning. Periodically audit counter items to remove unused kitchen gadgets, ensuring that every displayed object serves a clear practical or aesthetic purpose within your home.
Styling, Presentation, or Organization Ideas
Effective presentation transforms everyday kitchen supplies into a curated display that elevates the overall atmosphere of your home decor. Replace commercial plastic soap bottles, oil containers, and dish detergent packaging with matching refillable glass dispensers equipped with stainless steel or brass pumps. Group items by functional purpose, such as establishing a dedicated beverage station in one corner and a primary cooking condiment station immediately beside the range. Incorporate natural organic elements like potted succulents, fresh culinary herbs, or dried floral stems to soften hard stone and tile surfaces. Use woven seagrass or jute baskets on open counter areas to conceal clutter like unopened mail, snack bags, or pet treats neatly out of view. Swapping out small decorative elements seasonally, such as introducing small pumpkins in autumn or fresh citrus bowls in summer, keeps your kitchen presentation feeling dynamic and fresh year-round.
Budget or Time Planning
Careful time management and smart material sourcing allow you to complete a full kitchen countertop refresh within a modest budget and short timeframe. A basic counter restyling project using existing kitchen items, fresh botanical cuttings, and simple surface cleaning takes approximately one to two hours to execute completely. Projects involving wood board conditioning, under-cabinet lighting installation, or custom tray organization require three to four hours of detailed setup time. Save money on decorative materials by shopping for secondhand wooden boards, ceramic crocks, and glass jars at local thrift markets or estate sales. Upcycle old wooden cutting boards by sanding away knife marks and applying fresh food-safe mineral oil to restore their rich natural color. Prioritize spending on high-touch functional items like durable glass oil dispensers, sturdy utensil crocks, and quality LED task lighting that withstand heavy daily kitchen use.
Creative Expansion and Advanced Inspiration
Once your primary kitchen counter decor is established, advanced styling additions can further enhance daily convenience and visual sophistication across your cooking space. Consider installing a wall-mounted magnetic knife strip made from matching hardwood above the main counter to display cutlery safely while clearing flat surface space. Adding a small, counter-depth plug-in espresso machine alongside custom ceramic cups creates a dedicated café nook that brings hotel-like luxury into daily morning routines. For advanced DIY enthusiasts, building custom floating corner shelves that blend into existing upper cabinetry provides extra vertical space for displaying decorative teapots and cookbooks. Integrating smart voice-controlled plugs for under-cabinet ambient lighting allows seamless automated illumination transitions from bright cooking task light to soft evening accent light. These creative expansion ideas ensure your kitchen counters remain highly functional, beautifully organized, and tailored to your evolving lifestyle needs.





Post Comment