10 Gravel Pathway DIY Ideas


Gravel pathways are one of the most practical and attractive outdoor improvements for gardens, front yards, backyards, and landscape projects. They combine durability, affordability, and natural beauty while requiring fewer materials than many hardscape alternatives. A thoughtfully designed gravel path improves accessibility, defines outdoor spaces, and creates visual flow between different landscape features. Whether the goal is connecting a patio to a garden, guiding visitors to an entrance, or adding structure to open spaces, gravel provides a versatile solution that suits many design styles. This article explores ten beginner-friendly DIY gravel pathway ideas that balance function with aesthetic appeal. You will learn practical construction methods, preparation techniques, material planning, and creative styling approaches that can be adapted to different outdoor environments while keeping projects organized, achievable, and suitable for various budgets.
Why Gravel Pathways Continue to Trend in Outdoor Design
Gravel pathways remain popular because they offer a combination of visual appeal, flexibility, and practical performance. Modern Pinterest ideas often feature gravel paths as an easy project that transforms outdoor areas without requiring advanced construction skills. They complement rustic, cottage, contemporary, and minimalist style landscapes while blending naturally with plants, stone borders, and wooden features. DIY enthusiasts appreciate that gravel pathways can often be completed with simple tools and readily available materials. The design can also be customized using different gravel sizes, edging materials, and decorative elements to suit individual preferences. Their ability to improve organization within gardens, reduce muddy walkways, and define outdoor zones makes them both decorative and functional. This combination of accessibility, creative inspiration, and long-lasting results explains why gravel pathway tutorials continue to attract beginners and experienced DIY planners alike.
Materials and Preparation
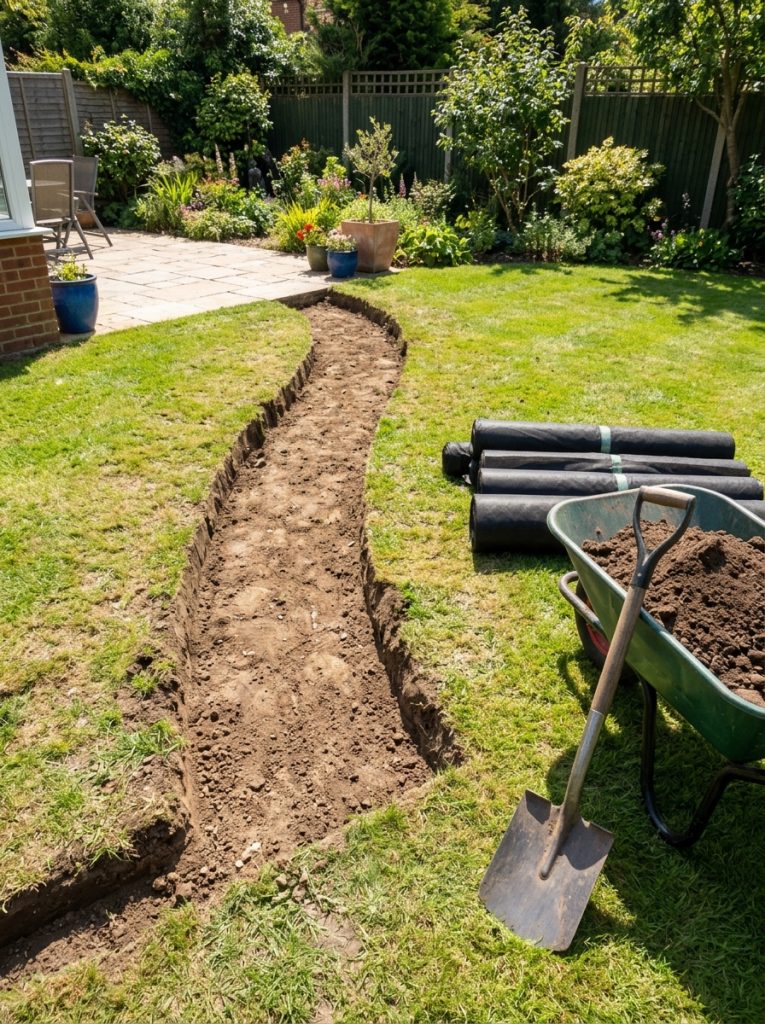
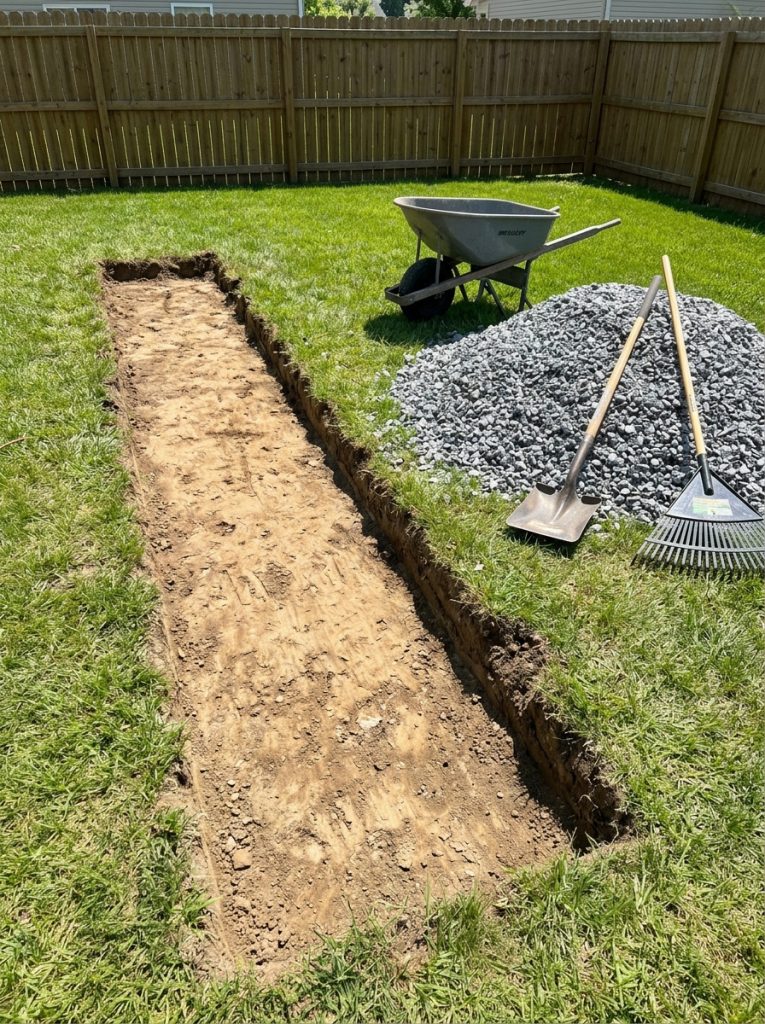
Proper preparation forms the foundation of every successful gravel pathway. Begin by measuring the planned route using string lines or landscape marking paint to establish a clear layout. Remove grass, weeds, and loose soil before excavating the pathway to an appropriate depth that accommodates the base materials and gravel surface. Essential materials typically include landscape fabric, crushed stone for the foundation, decorative gravel, edging materials, and securing pins. Common tools include a shovel, rake, tamper, wheelbarrow, level, measuring tape, and garden gloves. Planning should also include drainage considerations to prevent water accumulation after rainfall. Gentle slopes, compacted foundations, and carefully installed edging help maintain the pathway over time. Spending additional time on preparation creates a stronger base, improves appearance, and minimizes future maintenance while making the overall DIY tutorial easier to complete successfully.
Curved Garden Gravel Walkway
How to Create
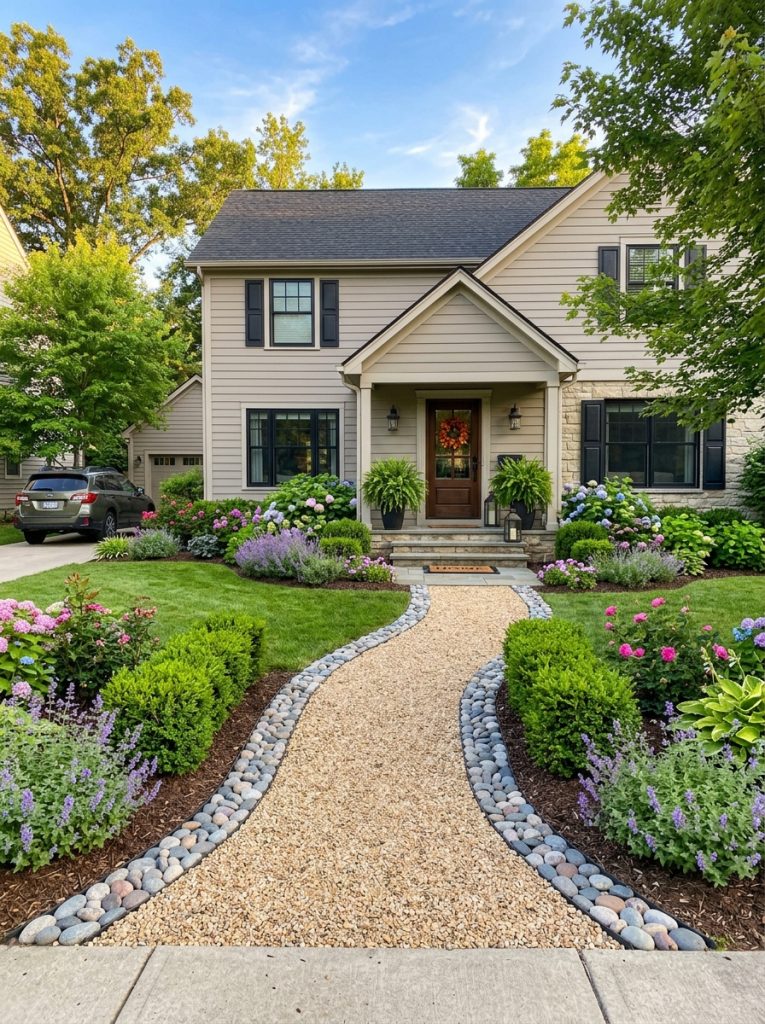
A gently curved gravel pathway creates a natural flow that complements flower beds, shrubs, and lawn spaces. Begin by outlining the desired curve using a garden hose or flexible rope before marking the final shape. Excavate the pathway evenly and compact the soil thoroughly to reduce future settling. Install landscape fabric across the entire surface to discourage weed growth while allowing proper drainage. Add a compacted layer of crushed stone before spreading decorative gravel evenly across the pathway. Flexible edging made from stone, metal, brick, or timber helps maintain the curved design while preventing gravel from spreading into planting beds. The finished path should follow the landscape naturally instead of forcing sharp turns. Curved walkways create visual movement, making gardens appear larger and more inviting. This beginner friendly project combines practical organization with attractive home decor landscaping, offering both accessibility and lasting aesthetic value through a relatively simple step by step construction process.
Straight Modern Minimalist Path
Step-by-Step Guide
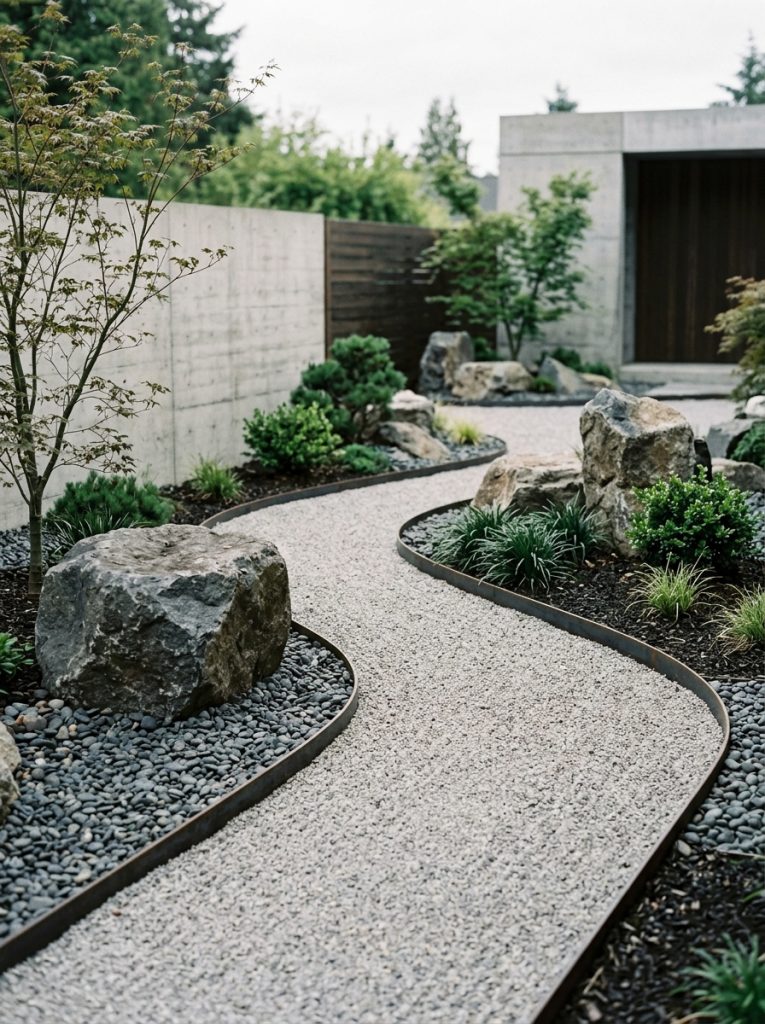
A straight gravel pathway works particularly well in contemporary landscapes where clean geometry and orderly planning define the overall design. Start by measuring equal widths throughout the entire route and verify straight lines using string guides and stakes. Excavate the area evenly before compacting the soil and installing landscape fabric. A crushed stone base creates structural stability and supports consistent drainage beneath the decorative gravel layer. Select gravel with uniform size and color to reinforce the minimalist style while maintaining a neat appearance. Install rigid edging materials that produce crisp, defined borders and prevent loose gravel from migrating onto lawns or patios. Regular leveling with a rake ensures an even finish across the surface. The completed pathway provides efficient movement between outdoor areas while contributing to a modern design aesthetic. Its clean appearance pairs well with geometric planting beds, contemporary seating, and organized landscape layouts that emphasize simplicity and visual balance.

Rustic Woodland Gravel Trail
Setup Method
A woodland-inspired gravel pathway embraces natural surroundings by incorporating organic shapes and earthy textures. Begin by selecting a route that follows existing trees, shrubs, or natural landscape contours instead of forcing straight lines. Remove vegetation carefully while preserving surrounding roots whenever possible. Install landscape fabric before adding a compacted stone foundation and a layer of coarse decorative gravel. Edge the pathway using logs, natural stones, or weathered timber to reinforce the rustic appearance. Leaf litter, shade-tolerant plants, and native ground covers surrounding the trail create a cohesive environment without overwhelming the walkway itself. The gravel surface remains stable while allowing rainwater to drain naturally into nearby soil. This creative project suits larger gardens and backyard retreats where visitors can experience a gradual transition through different outdoor spaces. The finished trail encourages relaxed walking while maintaining practical organization and preserving the natural character of the landscape.
Brick-Edged Gravel Walkway
How to Make
Combining gravel with brick edging creates a timeless pathway that blends traditional craftsmanship with practical construction. Begin by excavating the path to accommodate both the gravel layers and the brick borders. Compact the soil before installing landscape fabric and a crushed stone base that supports both materials evenly. Lay bricks carefully along each edge, ensuring consistent spacing and level alignment before securing them firmly. Once the edging is complete, fill the center with decorative gravel and distribute it evenly using a landscape rake. The brick borders provide excellent containment while adding visual contrast that highlights the pathway’s shape. This approach works especially well near patios, vegetable gardens, and entrances where defined edges improve both appearance and maintenance. The combination of textured gravel and structured brick produces an attractive balance between informal landscape elements and organized architectural features, making it a practical DIY pathway suitable for many outdoor environments.

Stepping Stone and Gravel Combination
Execution Process
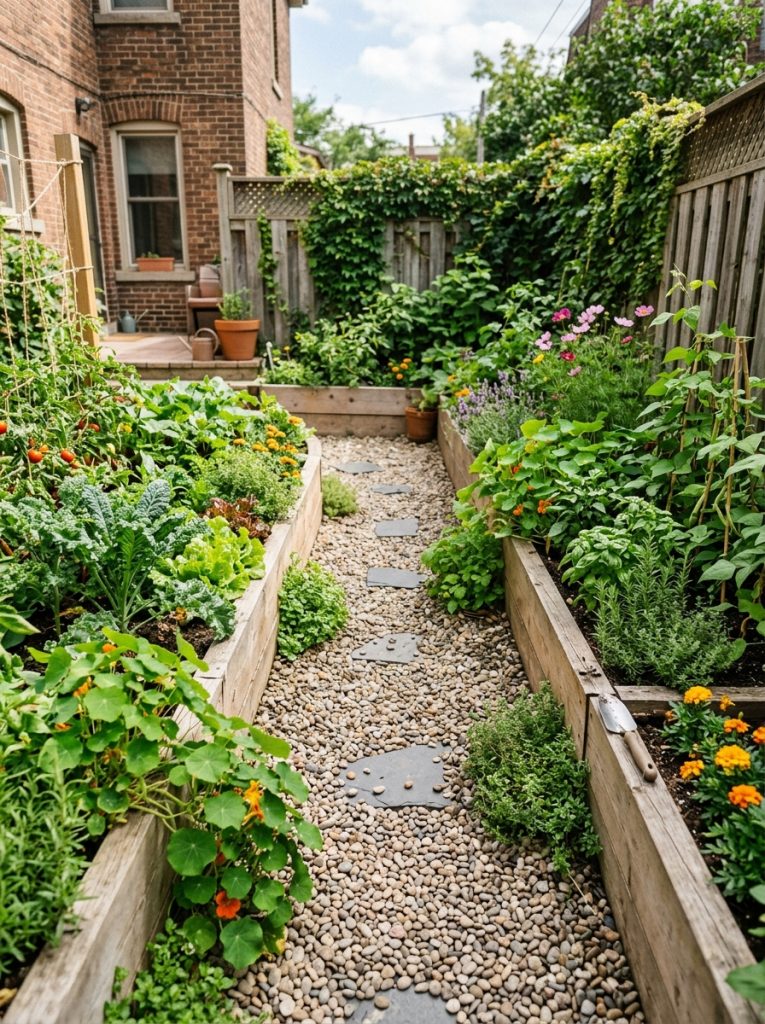
A combination of stepping stones and gravel offers both decorative interest and comfortable walking surfaces. Begin by planning equal spacing between each stepping stone based on natural walking distance. Excavate the entire pathway before installing landscape fabric and a compacted crushed stone foundation. Position each stepping stone securely, checking that every surface remains level with neighboring stones. Fill the surrounding spaces with decorative gravel, distributing it evenly to create a continuous walking surface. The gravel stabilizes the stones while improving drainage throughout the path. Small ornamental plants positioned alongside the walkway enhance the overall presentation without interfering with movement. This beginner friendly DIY tutorial creates visual rhythm while reducing the amount of stone required compared to fully paved pathways. The combination of solid stepping surfaces and loose gravel produces a balanced aesthetic that suits cottage gardens, backyard landscapes, and modern outdoor spaces alike.
Circular Garden Feature Path
How to Create
A circular gravel pathway creates an attractive focal point by surrounding a central landscape feature such as a tree, sculpture, fountain, or seating area. Begin by determining the center point and marking the circle carefully with a measuring line to maintain consistent proportions. Excavate the pathway evenly before installing landscape fabric, compacted stone, and decorative gravel. Durable edging materials preserve the circular form while preventing movement of loose gravel into surrounding lawns. The central feature should remain visually prominent, with the pathway providing convenient access from multiple directions. Planting low-growing flowers or ornamental grasses around the outer edge further emphasizes the circular design while adding seasonal color and texture. This creative project introduces organization and balance into larger gardens while encouraging visitors to explore different viewing angles. The finished design combines practical accessibility with aesthetic appeal, making it an effective landscape improvement for many outdoor settings.

Cottage Garden Gravel Walk
Step-by-Step Guide
A cottage garden gravel pathway emphasizes softness, color, and informal charm while remaining practical for everyday use. Start by laying out a gently winding route that passes naturally through planting beds filled with seasonal flowers and foliage. Remove vegetation, compact the soil, and install landscape fabric before adding a crushed stone base and decorative gravel surface. Stone or timber edging helps maintain the pathway while blending with traditional garden materials. Allow flowering plants to soften the edges without obstructing comfortable walking space. Decorative garden structures, climbing plants, and simple seating areas complement the relaxed atmosphere while maintaining functional organization. Gravel textures contrast beautifully with lush vegetation, enhancing the visual richness of the landscape throughout the year. This easy project provides both accessibility and aesthetic value while creating an inviting outdoor environment suitable for entertaining, gardening, or quiet relaxation within a natural setting.

Large Gravel Entry Path
How to Make
A wide gravel entrance pathway creates a welcoming transition between the street, driveway, and front entrance. Begin by measuring generous dimensions that comfortably accommodate regular foot traffic while maintaining balanced proportions with the surrounding landscape. Excavate the area uniformly before installing landscape fabric and a thick, compacted crushed stone foundation capable of supporting heavier use. Add decorative gravel in even layers and level the surface carefully to achieve a consistent appearance. Strong edging materials prevent displacement and preserve the pathway’s clean outline. Low-maintenance shrubs, symmetrical planting arrangements, and outdoor lighting positioned alongside the path enhance visibility while reinforcing the organized design. A wider pathway not only improves accessibility but also creates a stronger visual impression upon arrival. This practical DIY solution combines durability with attractive home decor landscaping, making it suitable for both traditional and contemporary residential properties.
Zen-Inspired Gravel Garden Path
Setup Method
A Zen-inspired gravel pathway focuses on simplicity, balance, and intentional placement of natural elements. Begin by selecting a straightforward route that encourages calm movement through the outdoor space. Excavate evenly before installing landscape fabric, compacted stone, and fine decorative gravel suitable for smooth raking patterns. Incorporate carefully positioned rocks, simple timber benches, and restrained planting arrangements that support the peaceful atmosphere without overcrowding the design. Defined edging maintains clean lines while preserving the gravel’s appearance over time. Gentle curves or straight sections may both work effectively, provided the overall layout remains uncluttered and harmonious. Regular maintenance includes occasional raking to refresh surface patterns and redistribute gravel evenly. This minimalist style emphasizes thoughtful planning, functional organization, and understated decoration while offering a relaxing outdoor environment that remains practical for everyday use and easy for beginners to maintain.
Mixed Stone Texture Gravel Path
Execution Process
A mixed stone texture pathway introduces visual variety by combining decorative gravel with carefully selected larger stones placed throughout the design. Begin by constructing the pathway using standard excavation, landscape fabric, compacted stone, and gravel installation techniques. After leveling the gravel, position larger accent stones at intervals that create balance without disrupting comfortable walking. Stone groupings can frame planting beds, highlight pathway curves, or define transition points between different outdoor areas. Durable edging keeps all materials contained while preserving the intended layout. The combination of varying textures creates greater depth and interest while maintaining practical functionality. Select stone colors that complement surrounding garden features to achieve a cohesive landscape appearance. This creative project demonstrates how simple material variations can transform a basic gravel path into a distinctive landscape feature while remaining achievable through beginner friendly DIY methods and careful planning.

Common Beginner Mistakes and How to Avoid Them
Many first-time DIY builders underestimate the importance of proper preparation, resulting in uneven surfaces, poor drainage, or shifting gravel over time. Skipping excavation depth or failing to compact the base often causes the pathway to settle unevenly after regular use. Omitting landscape fabric allows weeds to emerge through the gravel, increasing maintenance significantly. Another common mistake involves selecting gravel that is either too large for comfortable walking or too fine to remain stable. Weak or missing edging also contributes to gravel spreading into lawns and planting beds. Measuring carefully before excavation and following each step by step preparation stage helps avoid unnecessary corrections later. Investing additional effort in the foundation produces a more durable pathway that requires less maintenance and provides a consistently attractive appearance throughout changing weather conditions.
Practical Tips for Better Results
Successful gravel pathways depend on consistent attention to detail throughout construction. Always verify measurements before excavation to maintain even widths and smooth curves. Compact every foundation layer thoroughly before adding the next material to improve long-term stability. Distribute gravel gradually rather than placing excessive amounts at once, making it easier to achieve an even surface. Check drainage by observing how water naturally moves across the landscape before finalizing the layout. Periodically rake the completed pathway to redistribute gravel and maintain a fresh appearance. Inspect edging annually to ensure it remains secure and continues containing the gravel effectively. Selecting complementary materials that match surrounding landscape features creates stronger visual harmony while improving the overall presentation. Careful planning, organized execution, and regular maintenance together produce professional-looking results that remain attractive for many years.
Styling, Presentation, and Organization Ideas
Thoughtful styling transforms a functional gravel pathway into a cohesive landscape feature. Frame the walkway with ornamental grasses, flowering perennials, or neatly trimmed shrubs that enhance the surrounding environment without restricting movement. Position decorative stones or small garden sculptures strategically rather than overcrowding the space. Solar lighting placed along pathway edges improves evening visibility while highlighting the route after sunset. Repeating similar edging materials throughout the garden strengthens design consistency and reinforces visual organization. Seating areas, raised planting beds, or simple wooden arches positioned near key sections create attractive focal points without distracting from the pathway itself. Maintaining clean edges, evenly distributed gravel, and healthy surrounding plants ensures the finished project continues to reflect careful planning while supporting an inviting outdoor atmosphere suitable for everyday enjoyment.
Budget and Time Planning
Careful budgeting allows DIY gravel pathway projects to remain manageable regardless of size. Begin by measuring the total pathway length and width to estimate quantities of crushed stone, decorative gravel, landscape fabric, and edging materials accurately. Purchasing only the required amounts minimizes waste while simplifying transportation and storage. Smaller pathways may be completed over a weekend, while longer or more detailed designs benefit from dividing the work into multiple stages. Preparing all tools before excavation reduces unnecessary delays during construction. Reusing existing stones, timber, or natural landscape features can further reduce overall expenses while adding character to the finished design. Creating a realistic timeline also allows adequate time for careful leveling, compaction, and finishing work, producing stronger results than rushing through the installation process.
Creative Expansion and Advanced Inspiration
Once basic gravel pathway techniques become familiar, larger creative projects become easier to plan and execute. Multiple pathways can connect patios, vegetable gardens, seating areas, and outdoor structures to create organized movement throughout the landscape. Decorative borders, patterned gravel sections, or integrated planting pockets introduce additional visual interest while maintaining practical functionality. Combining gravel with wood, stone, or concrete features expands design possibilities without greatly increasing construction complexity. Seasonal decorations, container gardens, and landscape lighting allow the pathway to evolve throughout the year while preserving its core structure. Experimenting with different shapes, textures, and layout patterns encourages continuous creativity while remaining grounded in practical construction principles. These advanced ideas help transform a simple DIY pathway into a comprehensive landscape design that balances beauty, accessibility, organization, and long-term outdoor enjoyment.





Post Comment