10 DIY Solar Garden Lights Ideas


DIY solar garden lights are a practical way to improve outdoor spaces while using renewable energy for everyday illumination. These creative projects combine simple materials with solar-powered components to create decorative and functional lighting for gardens, patios, pathways, flower beds, and outdoor seating areas. Many Pinterest ideas focus on transforming ordinary objects into attractive garden features that provide soft lighting after sunset without increasing electricity costs. This article explains how to plan each project, prepare the necessary materials, and complete beginner friendly designs using clear step by step methods. You will also learn practical styling techniques, organization strategies, and planning tips that help create durable outdoor decorations suitable for different garden sizes, making every project both attractive and useful throughout the year.
Why DIY Solar Garden Lights Are Trending
Solar garden lighting continues to appear among popular Pinterest ideas because it combines sustainability, decoration, and easy project planning in one creative activity. Many homeowners enjoy DIY projects that improve outdoor living spaces without requiring advanced construction skills. Solar lights are especially appealing because they recharge during daylight hours and automatically illuminate at night. Beginners appreciate that many projects require only basic materials and common hand tools. Modern design trends also favor soft outdoor lighting that highlights landscaping, walkways, and seating areas while creating a welcoming atmosphere. These handmade decorations fit many garden styles, including rustic, minimalist style, cottage gardens, and contemporary outdoor spaces. Their flexibility allows creative ideas to be customized using recycled containers, decorative stones, wood, glass, or metal while keeping projects affordable and suitable for different budgets.
Materials and Preparation
Preparing before beginning any DIY solar lighting project improves both safety and final results. Gather solar light stakes or replacement solar light tops, waterproof adhesive, outdoor paint if desired, decorative containers, glass jars, wooden boards, metal hooks, gravel, sand, stones, and basic hand tools such as pliers, a drill, measuring tape, and protective gloves. Clean every container before assembly to improve adhesion and overall appearance. Measure installation locations to determine spacing between lights and ensure enough sunlight reaches each solar panel throughout the day. Plan drainage if decorative containers may collect rainwater. Sketch a simple layout for pathways, flower beds, or patios before installation. Careful planning helps maintain consistent lighting, balanced decoration, and easier organization throughout the garden while reducing unnecessary adjustments after the project is completed.
Idea 1: Mason Jar Solar Lanterns
How to Create
Transform ordinary glass mason jars into elegant solar lanterns that provide soft evening lighting around patios or garden paths. Begin by cleaning each jar thoroughly and removing labels or residue. Fill the bottom with decorative stones, colored glass pieces, or clean sand to add weight and improve stability. Position a solar light insert or solar lid securely at the opening so the panel receives direct sunlight during the day. If necessary, use waterproof adhesive to secure the fixture while keeping battery compartments accessible for maintenance. Arrange several jars at different heights on outdoor tables, garden steps, or hanging hooks to create visual variety. Clear glass produces brighter illumination, while frosted glass creates a softer aesthetic appearance. Grouping lanterns together provides better lighting than using a single unit. This beginner friendly tutorial combines recycled materials with simple assembly techniques to create attractive handmade decoration suitable for many home decor styles.

Idea 2: Solar Pathway Stone Lights
Step-by-Step Guide
Solar pathway stone lights blend naturally into landscaping while clearly defining walking areas after sunset. Select flat decorative stones large enough to support small solar lights or create recessed openings that securely hold each fixture. Arrange the stones evenly along pathways before installation to confirm spacing and walking comfort. Dig shallow recesses so each stone sits level with surrounding soil, reducing movement over time. Position the solar panels where nearby plants will not block sunlight during the day. Add gravel beneath each stone to improve drainage and prevent shifting after rainfall. Combining different stone shapes creates a natural appearance while maintaining consistent illumination. This creative project works well in both modern design and rustic landscapes because the lighting integrates smoothly into existing garden features. Regularly remove dirt or fallen leaves from solar panels to maintain charging efficiency and reliable nighttime performance throughout every season.
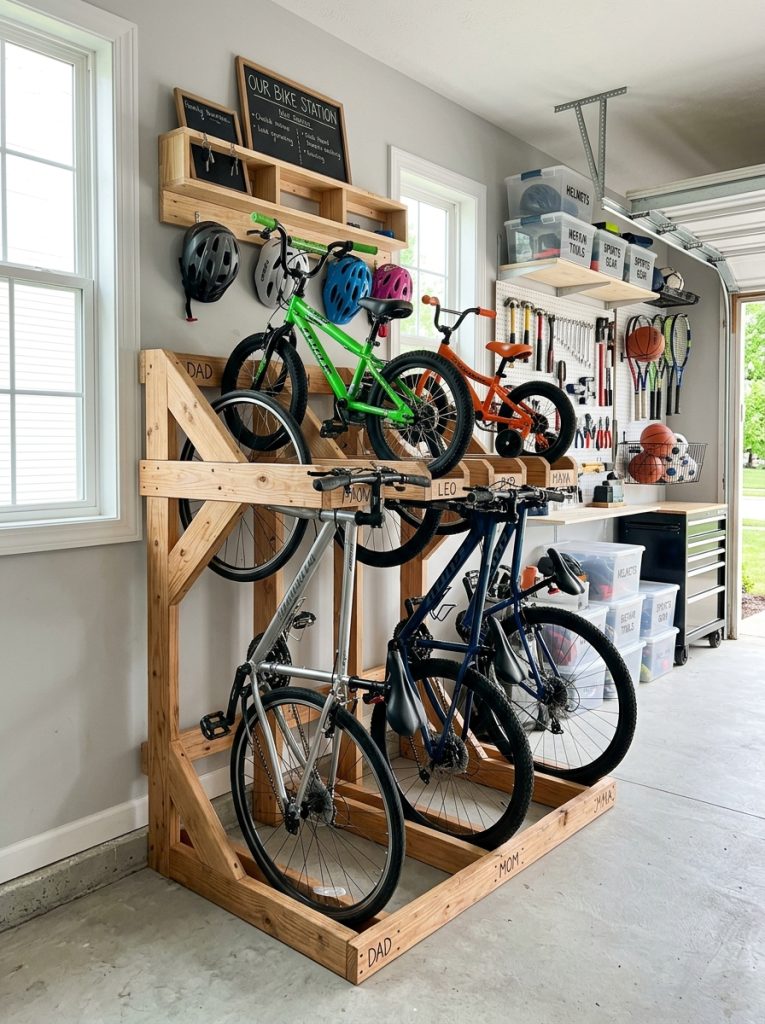
Idea 3: Hanging Tin Can Solar Lanterns
How to Make
Recycled metal cans provide an excellent foundation for decorative hanging solar lanterns. Clean each can thoroughly and remove sharp edges before beginning. Paint the exterior with weather-resistant outdoor paint if a colorful finish is desired. Create decorative patterns by carefully drilling evenly spaced holes around the sides, allowing light to shine through after dark. Attach sturdy wire handles for hanging from tree branches, pergolas, or shepherd hooks. Install compact solar light inserts inside each container so the panels remain exposed to sunlight during the day. Hang the lanterns at different heights to create depth and balanced outdoor decoration. The illuminated patterns produced through the drilled holes add visual interest without requiring complicated construction techniques. This DIY tutorial encourages recycling while creating practical garden lighting that complements patios, outdoor dining spaces, and relaxation areas using inexpensive materials and straightforward planning methods suitable for beginners.

Idea 4: Solar Watering Can Light Display
Execution Process
An old metal watering can can become a striking garden feature by creating the illusion of glowing water flowing into a flower bed. Attach a strong metal support rod securely into the ground and position the watering can at an angled pouring position. Install small solar string lights inside the spout so the illuminated strands cascade downward toward decorative stones or flowers. Hide wires carefully inside the container to maintain a clean appearance. Surround the base with gravel, mulch, or flowering plants to blend the display naturally into the landscape. During daylight hours, the solar panel charges while remaining discreetly positioned on top of the watering can or nearby. After sunset, the flowing lights create an attractive focal point that combines functionality with artistic inspiration. This easy project requires simple materials while producing a distinctive handmade decoration suitable for gardens of many sizes.

Idea 5: Wooden Post Solar Lantern Stand
Setup Method
Building a wooden post lantern stand creates organized lighting for pathways, driveways, or seating areas. Select treated wooden posts suitable for outdoor use and cut them to equal heights for a consistent appearance. Sand rough edges before applying weather-resistant protective coating if desired. Install each post securely into the ground using gravel for stability. Attach decorative brackets near the top to support solar lanterns or hanging solar fixtures. Maintain equal spacing between posts to create balanced illumination across the landscape. Position each solar panel toward open sunlight to maximize charging performance. Decorative climbing plants can later be trained around the posts without covering the solar panels. This project combines organization with modern design by establishing structured lighting zones that improve navigation while enhancing overall garden decoration. The design remains easy to maintain because individual lanterns can be replaced without rebuilding the entire structure.

Idea 6: Decorative Solar Birdbath Accent
How to Create
A birdbath can serve as both a garden feature and a subtle lighting display when paired with solar illumination. Clean the birdbath thoroughly before adding decorative glass pebbles or smooth stones to the basin. Position a floating solar light or securely mount a compact solar fixture along the edge while ensuring adequate exposure to sunlight. Avoid placing heavy decorations that interfere with water drainage or cleaning. Surround the base with low-growing flowers or ornamental grasses to create a balanced landscape arrangement. Soft evening lighting reflects across the water surface, producing gentle visual effects without overpowering surrounding plants. This beginner friendly creative project adds functionality while supporting the overall aesthetic of outdoor spaces. Regular cleaning prevents debris from reducing light reflection and keeps the feature attractive throughout changing seasons while requiring only basic maintenance and planning.

Idea 7: Solar Fence Light Display
Step-by-Step Guide
Fence-mounted solar lights provide practical illumination while highlighting garden boundaries and outdoor living areas. Begin by measuring equal distances between installation points to maintain consistent visual balance. Attach solar light fixtures securely using corrosion-resistant screws suitable for exterior use. Position every panel where fencing receives several hours of direct sunlight during the day. Decorative wooden backing plates may be added behind each light to create a finished appearance while complementing surrounding home decor. Coordinate spacing with nearby landscaping features such as flower beds or shrubs to produce a cohesive outdoor design. This easy project improves visibility around patios and pathways while adding decorative interest without complicated electrical wiring. Routine cleaning of solar panels and periodic inspection of mounting hardware helps maintain dependable operation and extends the life of each lighting fixture in various weather conditions.

Idea 8: Solar Light Planters
How to Make
Large outdoor planters can combine greenery with attractive nighttime illumination by integrating solar lights into the container design. Choose sturdy planters with sufficient depth for both plants and solar fixtures. Fill the bottom with drainage material before adding quality planting soil appropriate for selected flowers or ornamental grasses. Position slim solar light stakes near the outer edge of each planter so the foliage does not shade the panels. Arrange plants with varying heights to frame the lights while maintaining easy access for cleaning and maintenance. Matching planters placed beside entryways, patios, or garden paths create organized lighting with coordinated decoration. This handmade project blends landscaping with functional illumination, making it suitable for both compact gardens and larger outdoor spaces. Careful planning ensures healthy plant growth while preserving efficient solar charging and consistent evening lighting.

Idea 9: Solar Chandelier for Outdoor Seating
How to Create
An outdoor solar chandelier creates a decorative centerpiece above patios, pergolas, or covered seating areas. Begin with a lightweight metal frame, old hanging basket, or circular wire structure that supports several small solar lanterns. Attach each light evenly around the frame to distribute weight and produce balanced illumination. Suspend the chandelier using durable outdoor chain or heavy-duty hooks anchored securely overhead. Ensure every solar panel receives direct sunlight before installation or use separate solar panels connected by discreet cables where appropriate. Add crystal-style beads, weather-resistant ornaments, or decorative wire accents to increase visual interest without adding excessive weight. Evening lighting creates a welcoming atmosphere for outdoor dining and relaxation while maintaining energy efficiency. This creative project combines aesthetic decoration with practical lighting, making it suitable for modern design as well as traditional garden settings.
Idea 10: Recycled Glass Bottle Solar Lights
Execution Process
Glass bottles can become elegant garden lighting by pairing them with compact solar light tops designed to fit bottle openings. Wash every bottle thoroughly and remove labels to reveal clean glass surfaces. Select bottles with different colors and heights to create visual variation throughout the display. Place decorative stones or sand inside the base for added stability if necessary. Insert the solar light securely into the opening, ensuring the panel remains level and exposed to sunlight. Arrange finished bottles along pathways, flower beds, or outdoor tables in coordinated groups rather than random placement. Colored glass produces subtle lighting effects that complement surrounding plants without overwhelming the landscape. This DIY tutorial encourages creative reuse of everyday materials while producing handmade decoration that remains practical, affordable, and suitable for beginners seeking attractive Pinterest inspiration.
Common Beginner Mistakes and How to Avoid Them
Many beginners position solar lights beneath dense trees or large shrubs where sunlight is limited, reducing battery charging and nighttime brightness. Another common mistake involves placing lights too close together, creating uneven illumination instead of balanced coverage across the garden. Skipping drainage planning may allow water to collect inside decorative containers, shortening the lifespan of lighting components. Using indoor adhesives or untreated wood outdoors can also reduce durability. Always measure installation areas before starting and confirm that each solar panel receives several hours of direct sunlight daily. Test lighting arrangements before permanently securing components to identify spacing adjustments early. Regular maintenance, including cleaning solar panels and removing debris, supports consistent performance while extending the life of every creative project.
Practical Tips for Better Results
Plan lighting around the purpose of each outdoor space rather than installing fixtures randomly. Pathways benefit from evenly spaced lights that improve visibility, while seating areas often require softer grouped illumination for a comfortable atmosphere. Mix different project styles to create visual variety without making the garden appear cluttered. Keep installation heights consistent when using hanging lanterns or fence lights to achieve a balanced appearance. Inspect batteries and panels seasonally to maintain charging performance. Clean glass surfaces regularly to maximize light output and preserve decorative appeal. Sketching layouts before installation helps organize materials, estimate project time, and reduce unnecessary adjustments. Careful planning supports professional-looking results while keeping every beginner friendly tutorial manageable and enjoyable.
Styling, Presentation, and Organization Ideas
Thoughtful organization helps DIY solar garden lights become an integrated part of the landscape instead of isolated decorations. Use matching materials throughout the garden to establish visual consistency, such as repeating wood finishes, stone colors, or glass textures across multiple projects. Group similar lights in odd numbers to create natural focal points near entrances or flower beds. Highlight important landscape features instead of attempting to illuminate every area equally. Balance decorative lighting with open space to avoid visual overcrowding. Coordinate lighting placement with existing garden furniture, pathways, and planting arrangements for a unified aesthetic. Seasonal decorations may also be incorporated without altering the permanent lighting layout, allowing flexible updates while preserving the overall design structure.
Budget and Time Planning
Effective planning keeps DIY solar lighting projects organized and affordable. Begin by determining how many lighting features are necessary before purchasing materials. Recycled containers, reclaimed wood, and leftover decorative stones can significantly reduce project costs while maintaining attractive results. Divide larger projects into smaller stages if working within limited time or budget. Complete pathway lighting first before expanding into decorative focal points such as chandeliers or lantern displays. Preparing all materials before assembly prevents interruptions and improves efficiency. Maintaining a written checklist for tools, measurements, and installation locations reduces mistakes and unnecessary purchases. Careful planning helps complete each easy project steadily while producing attractive outdoor decoration without exceeding available resources.
Creative Expansion and Advanced Inspiration
After mastering basic DIY solar garden lights, additional creative ideas can expand the overall landscape design. Combine lighting with vertical gardens, decorative trellises, raised planting beds, or outdoor wall features to build layered visual interest. Experiment with varied lighting heights to emphasize pathways, seating areas, and landscape borders while maintaining consistent organization. Seasonal decorative elements can be added around existing solar installations without replacing the original structures. Consider creating themed lighting zones that distinguish entertainment spaces from quiet garden corners. Advanced planning also allows future expansion by leaving space for additional projects as landscaping develops over time. These thoughtful improvements transform simple handmade lighting into a cohesive outdoor environment that reflects careful planning, modern design principles, and long-lasting practical functionality.





Post Comment