10 Summer Rock Painting Ideas


Summer rock painting is a creative DIY activity that combines art, nature, and seasonal inspiration into an enjoyable project for all ages. Smooth stones become colorful decorative pieces that can brighten gardens, patios, flower beds, desks, or indoor home decor. Pinterest ideas frequently feature painted rocks because they are affordable, beginner friendly, and easy to personalize with bright colors, cheerful patterns, and summer-inspired themes. Whether creating decorations for your own home or thoughtful handmade gifts, rock painting offers endless opportunities for artistic expression using only a few basic materials. This guide introduces ten summer rock painting ideas with practical step by step methods that are simple to follow. You will also learn how to prepare rocks properly, organize your supplies, avoid common painting mistakes, and create durable outdoor decorations that remain attractive throughout the summer season.
Why Summer Rock Painting Is Trending
Summer rock painting continues to gain popularity because it combines creativity with outdoor inspiration while requiring only inexpensive materials. Pinterest ideas often highlight painted rocks as versatile decorations that suit gardens, patios, walkways, flower pots, and seasonal displays. Their small size makes them approachable for beginners, while the endless design possibilities encourage creativity at every skill level. Families also appreciate rock painting because it provides a relaxing activity that can be completed indoors or outdoors without complicated equipment. Bright seasonal colors, floral artwork, beach themes, and cheerful patterns reflect the energy of summer while allowing every finished project to feel unique. Handmade painted rocks can also serve as decorative gifts, garden markers, or table accents. This balance of affordability, artistic freedom, and practical decoration explains why summer rock painting remains a favorite creative project across Pinterest and DIY communities.
Materials and Preparation
Proper preparation helps painted rocks achieve a smooth finish and long-lasting durability. Gather smooth stones, acrylic paints, paintbrushes in different sizes, paint pens, dotting tools, water containers, paper towels, palettes, pencils for sketching, and clear outdoor sealant. Wash every rock thoroughly using water and a soft brush to remove dirt, sand, or dust before allowing them to dry completely. Lightly sanding rough areas can improve the painting surface if necessary. Organize paint colors and tools before beginning so each stage flows smoothly without interruptions. Sketch simple designs lightly with a pencil before applying paint to improve accuracy. Work on a protected table surface and allow each paint layer to dry fully before adding additional details. Careful planning and preparation create brighter colors, cleaner lines, and more durable handmade decoration suitable for indoor or outdoor display.
Idea 1: Bright Sunflower Painted Rock
How to Create
A sunflower design captures the warmth and brightness of summer while remaining easy for beginners to paint. Begin by applying a sky blue or white background to the rock and allow it to dry completely. Paint a large brown circle in the center before adding evenly spaced yellow petals radiating outward. Layer a second shade of yellow near the petal bases to introduce subtle depth without making the design complicated. Add small green leaves beneath the flower to complete the composition while maintaining balanced proportions across the rock surface. Finish with tiny white highlights if desired before sealing the completed artwork with a clear protective coating. Display the sunflower rock in flower beds, plant containers, or garden borders where its cheerful colors complement surrounding greenery. This easy project provides attractive seasonal decoration using simple materials and beginner friendly painting techniques.

Idea 2: Tropical Flamingo Rock Art
Step-by-Step Guide
A tropical flamingo design introduces vibrant vacation-inspired color into summer rock painting. Start by covering the rock with a soft turquoise or pale blue background that represents a sunny sky or tropical water. Sketch a simple flamingo outline using a pencil before filling the body with bright pink paint. Add a curved neck, black-tipped beak, and thin legs using a fine detail brush or paint pen. Include small green palm leaves or tropical flowers around the bird to complete the summer theme without overcrowding the design. Maintain clean outlines by allowing each color to dry before painting adjacent sections. Finish with a protective sealant suitable for outdoor use. This creative project combines bold colors with simple shapes, making it accessible for beginners while creating a lively decorative accent suitable for patios, gardens, and seasonal displays.
Idea 3: Watermelon Slice Rock
How to Make
A watermelon slice design celebrates one of summer’s most recognizable fruits using bold color contrasts and simple painting techniques. Paint the entire rock white as a base coat before adding a curved pink section across the upper portion. Create the green rind by painting two curved bands along the bottom edge using dark and light green shades. Add tiny black teardrop-shaped seeds evenly across the pink area while leaving enough spacing to maintain a balanced appearance. Clean edges between the color sections improve the realistic effect while keeping the overall design beginner friendly. Apply a glossy sealant after the paint dries completely to enhance color vibrancy and protect the finished decoration. Display several watermelon rocks together in planters, picnic table centerpieces, or outdoor garden arrangements for a playful seasonal accent.
Idea 4: Colorful Butterfly Rock
Setup Method
Butterflies symbolize warm weather and blooming gardens, making them perfect subjects for summer rock painting. Begin by selecting a light background color that allows the butterfly to stand out clearly. Sketch a simple butterfly body and symmetrical wings using a pencil before filling each wing with bright colors such as orange, yellow, blue, and pink. Outline the wings using a black paint pen or fine brush to define every section more clearly. Add small dots or curved patterns inside the wings for decorative detail while maintaining symmetry across both sides. Paint small flowers or green leaves around the butterfly if additional decoration is desired. Seal the finished artwork thoroughly before placing it among flowers, garden pathways, or decorative trays. This beginner friendly project emphasizes vibrant color combinations and simple artistic techniques.
Idea 5: Beach Sunset Rock Painting
Execution Process
A beach sunset design transforms an ordinary rock into a miniature coastal landscape inspired by relaxing summer evenings. Begin by blending orange, coral, pink, and yellow acrylic paint smoothly across the rock to create a warm sunset sky. Paint a deep blue section along the lower edge to represent the ocean while allowing a clean horizon line between the water and sky. Once dry, add black silhouettes of palm trees, distant birds, or gentle waves using a fine detail brush. Keeping the silhouette elements simple allows the colorful background to remain the focal point of the artwork. Apply multiple thin paint layers rather than one thick coat to create smooth color transitions. Finish with a weather-resistant sealant before displaying the rock on a shelf, garden border, or patio table as seasonal decoration.
Idea 6: Ice Cream Cone Rock Design
How to Create
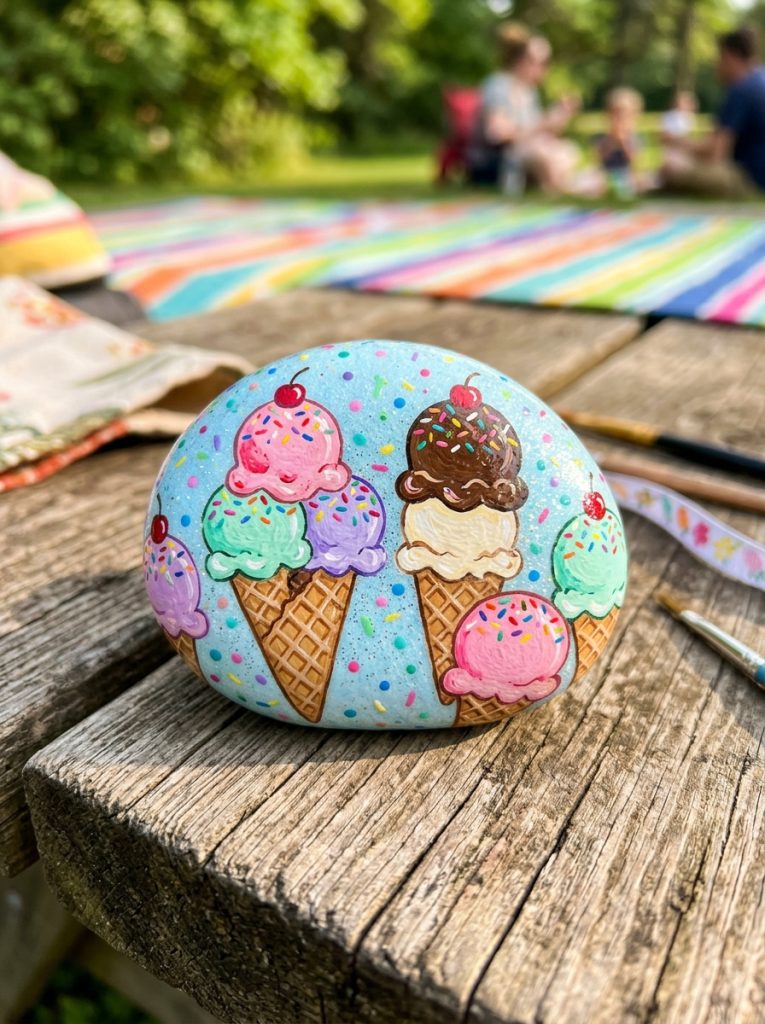
A colorful ice cream cone design brings cheerful summer energy to any painted rock collection. Apply a soft pastel background before sketching a simple cone with one or two scoops of ice cream above it. Paint the cone using light brown shades with thin crisscross lines that resemble a waffle texture. Choose bright colors such as pink, mint green, lavender, or yellow for the scoops, then add tiny sprinkles using contrasting paint colors and a dotting tool. Maintain clean edges around each scoop while allowing every layer to dry before adding decorative details. Finish the project with a clear protective sealant that preserves the bright colors. This playful beginner friendly project works well for outdoor decorations, children’s craft collections, or summer-themed table displays.
Idea 7: Rainbow Sunshine Rock
Step-by-Step Guide
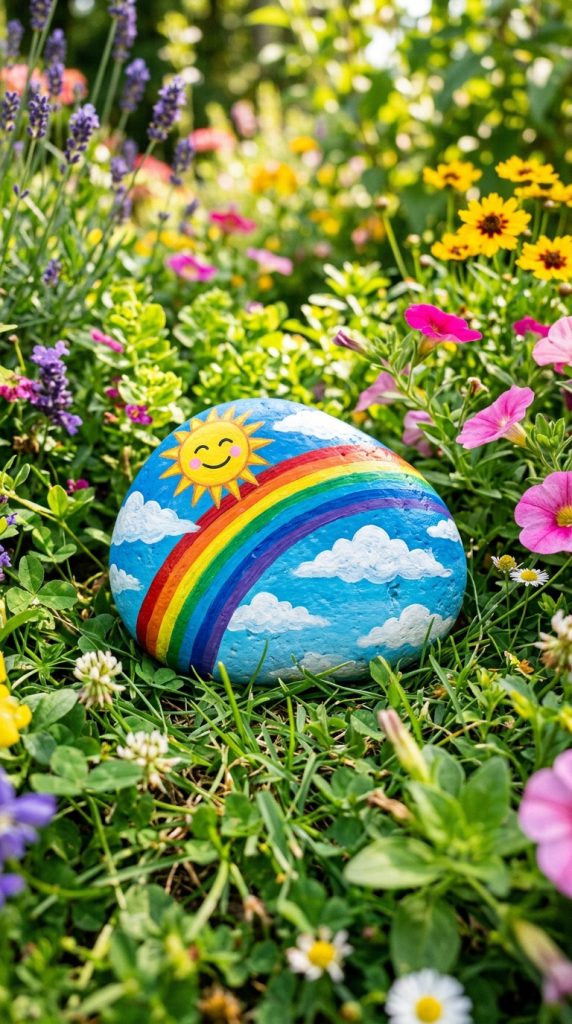
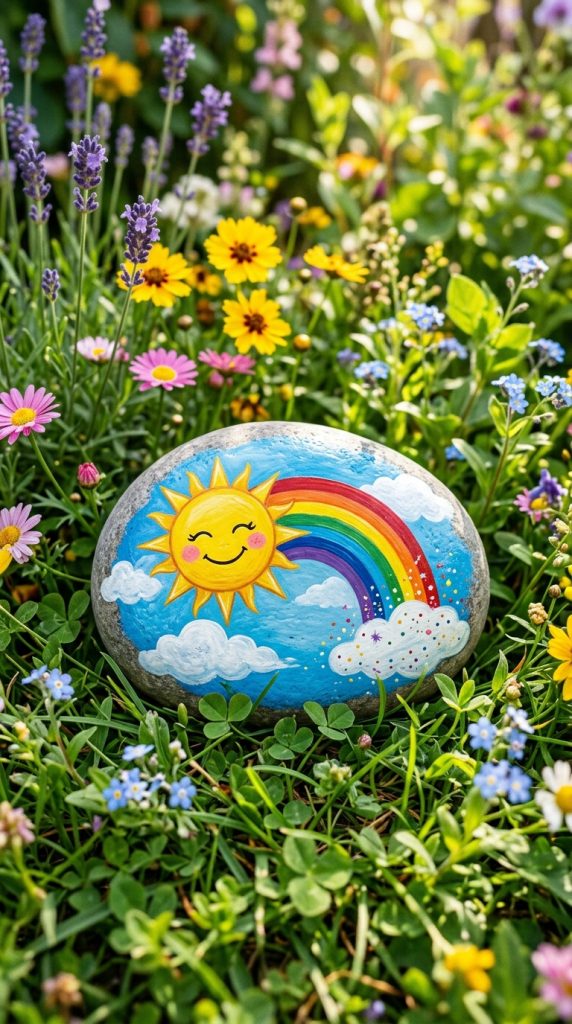
A rainbow and sunshine design combines two cheerful summer symbols into one colorful creative project. Begin by painting a white or pale blue background that allows the bright colors to stand out clearly. Create a smiling yellow sun in one corner before painting a curved rainbow using evenly spaced bands of red, orange, yellow, green, blue, and purple. Outline the rainbow lightly if necessary to maintain smooth curved lines throughout the design. Add fluffy white clouds beneath the rainbow to soften the composition while balancing the overall layout. Simple facial expressions on the sun can introduce playful personality without making the artwork overly detailed. Apply a glossy protective finish after drying to preserve the bright colors. Display the completed rock in gardens, patios, or indoor decorative bowls throughout the summer season.
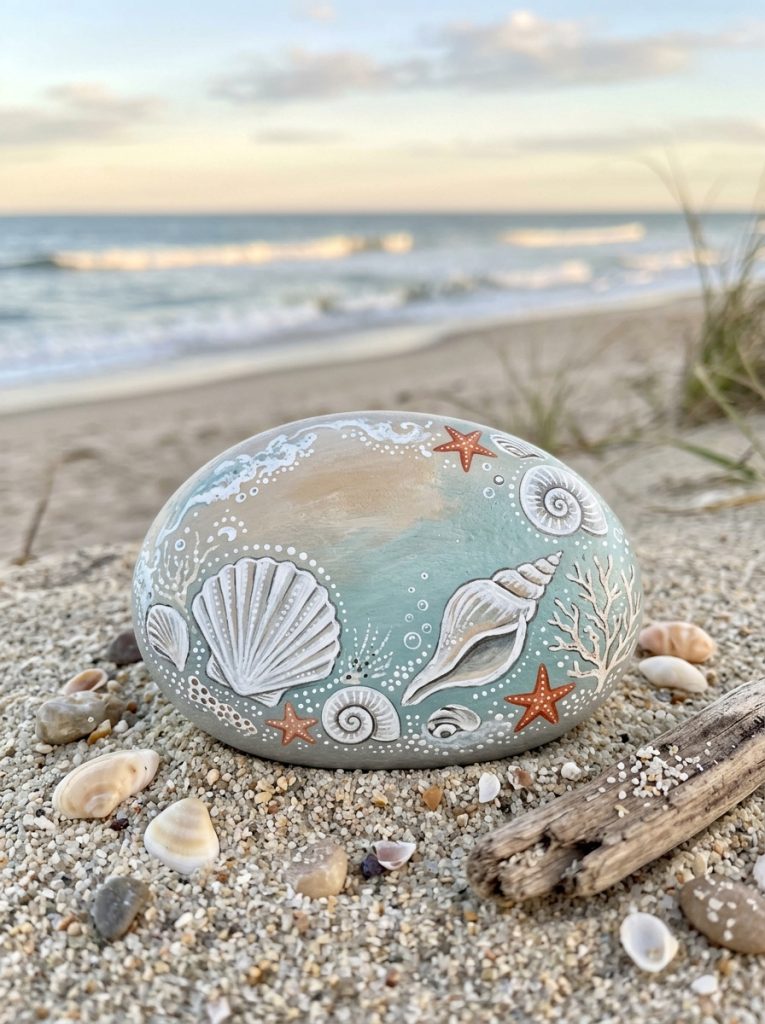
Idea 8: Seashell Pattern Rock
How to Make
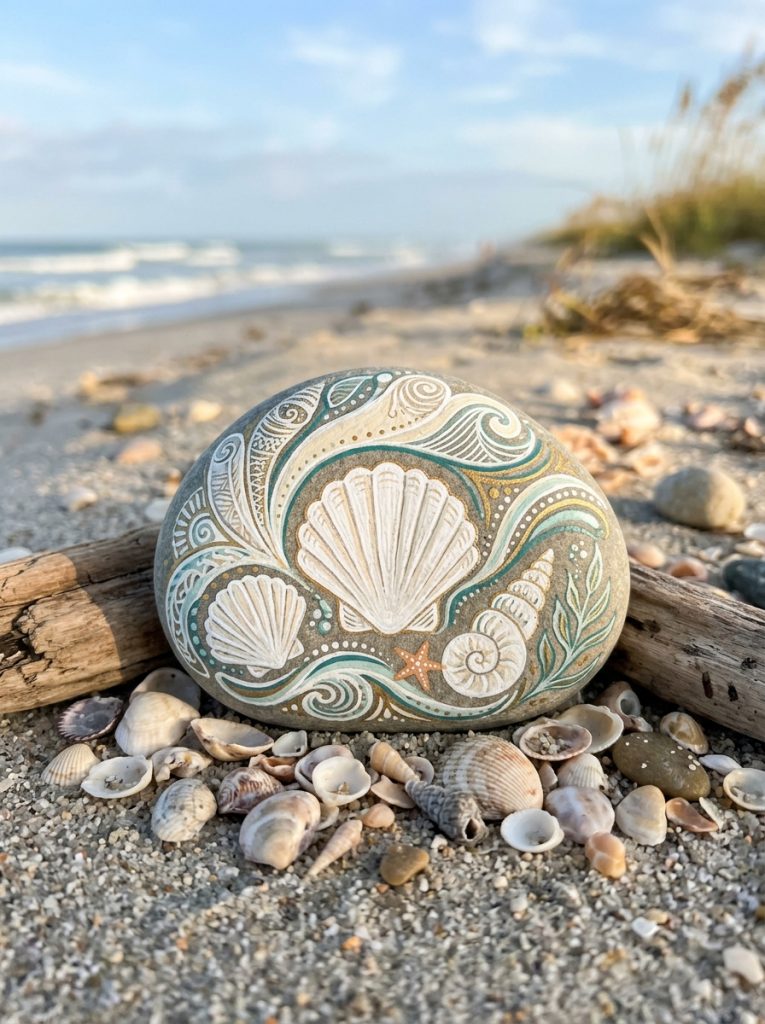
A seashell-inspired rock celebrates beach vacations through elegant coastal artwork. Paint the rock in soft sandy beige, pearl white, or pale blue before allowing the background to dry thoroughly. Use a fine detail brush to create several overlapping seashell outlines with curved radiating lines extending from each shell’s base. Introduce subtle shading using light gray or pale pink paint to create gentle dimension while maintaining a clean minimalist style. Tiny white highlights along the shell ridges add additional depth without overwhelming the design. Small starfish or wave accents may be painted around the shells if extra decoration is desired. Finish with a glossy outdoor sealant that enhances color while protecting the artwork from weather exposure. This design suits coastal home decor and beach-inspired summer decorations beautifully.
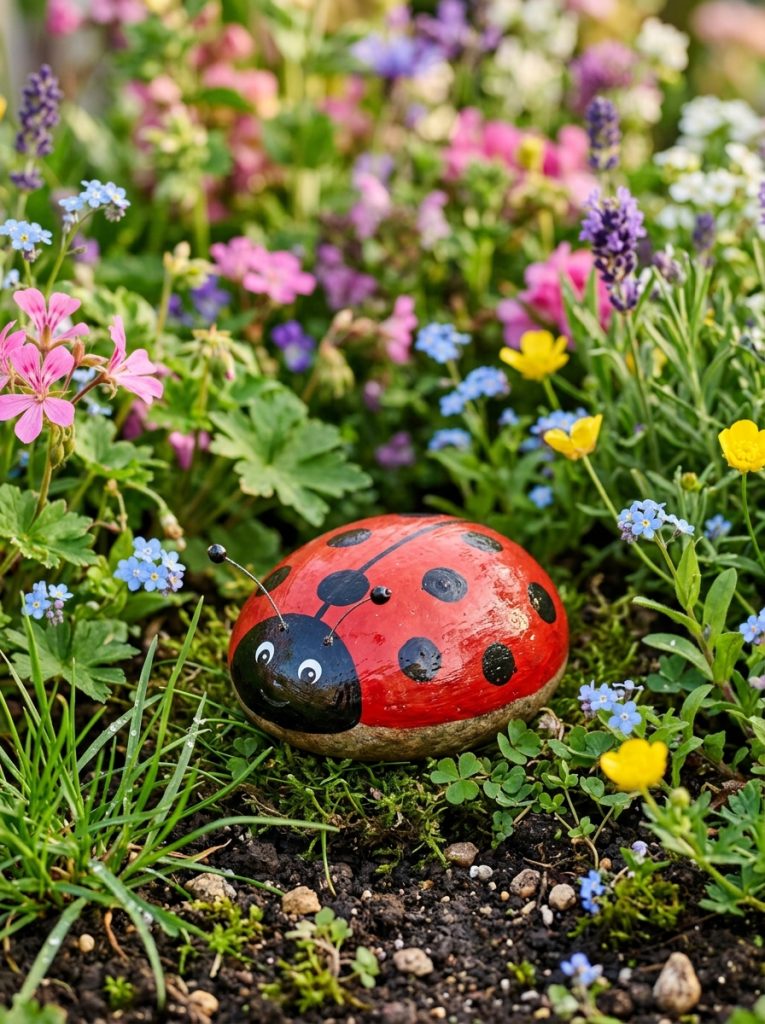
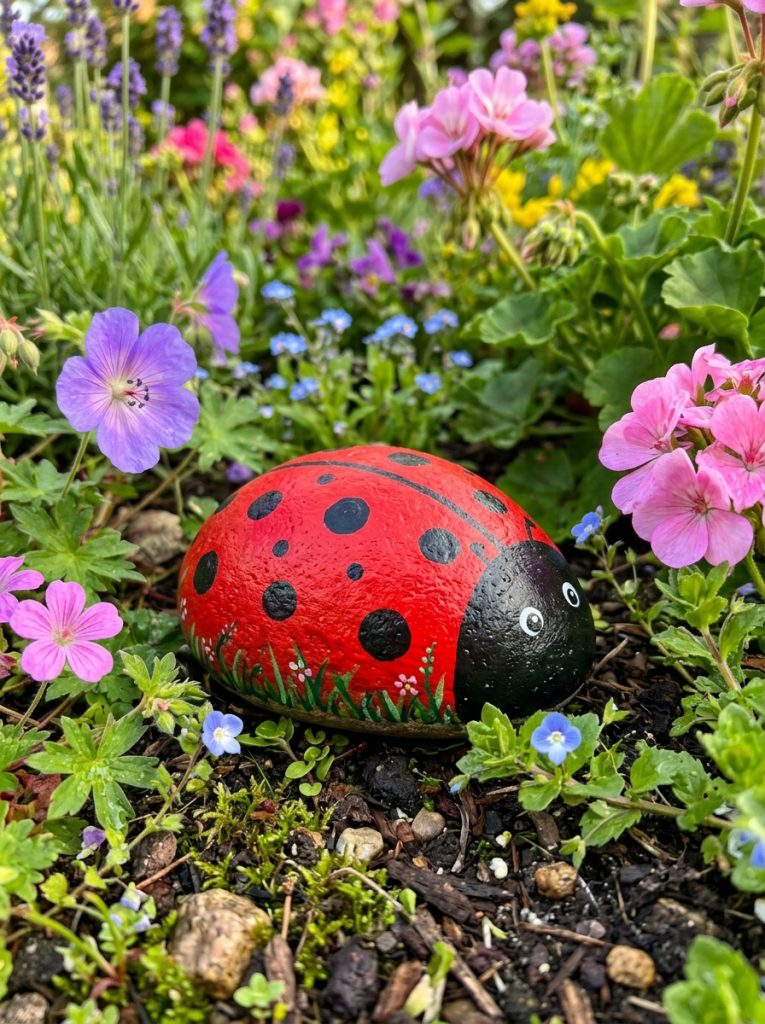
Idea 9: Ladybug Garden Rock
Setup Method
A ladybug rock creates charming garden decoration while requiring only a few basic painting techniques. Cover the rock with bright red paint before allowing it to dry completely. Divide the shell using a thin black line running from top to bottom, then paint the head in solid black near one end of the rock. Add evenly spaced black dots across both sides of the shell while maintaining balanced placement. Small white dots on the eyes create a friendly appearance suitable for decorative garden displays. Paint green grass or tiny flowers beneath the ladybug if additional detail is desired without overcrowding the design. Seal the finished artwork thoroughly before placing it near flower beds, herb gardens, or outdoor planters. This simple project remains one of the most beginner friendly painted rock ideas.

Idea 10: Summer Fruit Collection Rocks
How to Create
Instead of painting one large design, create a coordinated collection of fruit-themed rocks featuring strawberries, pineapples, lemons, cherries, and oranges. Assign one fruit to each rock while maintaining similar painting styles and bright summer colors throughout the collection. Begin by applying solid background colors before adding fruit outlines and decorative details with smaller brushes. Simple highlights and leaf accents improve realism while preserving the playful appearance. Arrange the completed fruit rocks together in decorative bowls, planter displays, or picnic table centerpieces where the coordinated collection becomes a colorful focal point. Applying the same protective sealant to every rock creates a consistent glossy finish across the entire set. This creative project encourages experimentation with multiple color combinations while producing attractive seasonal home decor.

Common Beginner Mistakes and How to Avoid Them
Many painted rocks lose their professional appearance because preparation is rushed. Painting directly onto dirty or damp stones often causes uneven color coverage and poor paint adhesion. Thick paint layers may crack as they dry, while skipping the sealant leaves artwork vulnerable to fading and moisture damage. Another common mistake involves adding too many decorative details, making the design appear crowded instead of balanced. Clean every rock carefully, allow all paint layers to dry fully, and apply thin coats instead of heavy applications. Planning the layout before painting also improves composition and helps maintain neat proportions. Careful preparation produces cleaner lines, brighter colors, and more durable outdoor decorations.
Practical Tips for Better Results
Organized materials and patient painting techniques significantly improve finished rock art. Work from larger background areas toward smaller decorative details rather than attempting fine artwork first. Keep separate water containers for light and dark paint colors to preserve brightness throughout the project. Rotate the rock instead of your brush when painting curved lines to improve accuracy. Practice simple patterns on paper before painting directly onto the stone if using fine brushes for detailed artwork. Applying two thin coats of sealant instead of one thick layer creates stronger protection and a smoother finish. These practical habits help every creative project achieve professional-looking results.
Styling, Presentation, and Organization Ideas
Painted rocks become more attractive when displayed as coordinated decorative collections. Arrange several rocks together inside shallow bowls, wooden trays, glass containers, or woven baskets for indoor decoration. Outdoors, position painted stones around flower beds, garden pathways, bird baths, or patio planters where their bright colors contrast naturally with greenery. Organize designs according to seasonal themes or color palettes to create balanced visual displays. Mixing larger and smaller rocks adds dimension while maintaining a clean arrangement. Thoughtful presentation transforms individual painted stones into eye-catching decorative features that enhance summer home decor.
Budget and Time Planning
Summer rock painting remains one of the most affordable DIY creative projects because many materials can be reused repeatedly. Collect smooth stones from appropriate sources or purchase inexpensive craft stones if necessary. Basic acrylic paints, brushes, and sealant support dozens of different projects without requiring frequent replacement. Simpler designs such as ladybugs or watermelon slices often take less than one hour, while detailed landscapes or butterfly artwork may require additional drying time between paint layers. Organizing materials before beginning reduces interruptions and improves efficiency while helping beginners complete attractive handmade decorations within a modest budget.
Creative Expansion and Advanced Inspiration
Once basic rock painting techniques become familiar, experiment with layered artwork, textured effects, metallic accents, or mixed seasonal themes to create more personalized designs. Combine beach scenes with tropical flowers, blend rainbow backgrounds with butterflies, or paint inspirational words alongside colorful illustrations for decorative garden markers. Coordinating painted rocks with flower pots, outdoor signs, or handmade planters creates a unified summer display throughout patios and gardens. Every completed project strengthens brush control, color blending, and artistic confidence while providing fresh inspiration for future Pinterest ideas. Over time, these creative skills allow you to develop unique handmade decorations that celebrate every season with color and imagination.





Post Comment